Saturday, November 19, 2016

Bolt Action 2nd Edition

While, I've finally had a chance to digest most of the changes in Bolt Action 2nd edition.  In short, I think Warlord has done a great job of updating the rules based on community feedback.  I really only take issue with one rule change (addition) ... more on that below.


Not only am I excited about these updates for WW2, but I'm also starting to update my Bolt Action Modern rules to align with the new changes.  Fortunately this shouldn't be too bad ... I've already taken a first pass at it for the reference sheets and it wasn't a massive amount of work.  Some changes, for example, additional shooting dice for LMGs and MMGs I had already included in my modern rules, so I didn't have to make those updates.

So, Warlord has added a bunch of things, like more scenarios and other things ... but what I'm focused on is the core rule changes and additions that will come up in almost any game played.  To that end, I'll attempt to summarize the changes to the core rules below ... and if I've missed anything major, please let me know in the comments and I'll update the post accordingly.  My approach was to go page-by-page in the core rules and use a highlighter to identify anything that seemed different to me (admittedly a few might have been 1st edition oversights ... but hopefully not).

SIGHT (page 31)
"... you may ignore units of infantry and artillery, both friendly and enemy ..." --- clearly you can't ignore vehicles and terrain, but this will make determining LOS much easier.

RALLY ORDER (page 39)
"No move or fire but lose D6+1 pin markers"

AT FULL STRENGTH (page 41)
If you've taken a full strength squad (the maximum number of troops allowed), and the squad has not yet suffered any casualties, you can re-roll failed order tests.

PINNED AND RALLY (page 41)
Units now ignore pins when taking a rally test.

INCREDIBLE COURAGE! (page 42)
"If an order test roll comes up two ones (snake eyes) then not only is the order automatically given but the unit also immediately loses D6+1 pin markers rather than 1."

RETAINING DOWN ORDER (page 43)
A unit that retains a Down order at the end of the turn (as in, don't return the order dice to the bag) removes D3 pin markers immediately.

AMBUSH (page 43)
Units can go into Ambush as before, but ... at the end of a turn, a unit that is still in Ambush can either stay in Ambush or choose to return their order dice to the bag.  If they choose to return the order die at the end of the turn ... "Alternatively, at this point a unit in Ambush can attempt to fire - roll a D6.  On a 4+ the unit can fire normally and then place its order die back in the dice bag.  On a 3 or less, the unit does nothing and the Ambush dice is put into the bag ..."

SHOOTING TO HIT MODIFIER FOR DOWN (page 54)
"Target is Down infantry/artillery .... -2"

WEAPONS CHART (page 62)
Assault Rifle range = 18".
Light Machine Gun (LMG) number of shots = 4.
Light Machine Gun (LMG) range = 36".
Medium Machine Gun (MMG) number of shots = 5.
Vehicle Flamethrower number of shots = D6+1.
All weapons capable of HE shots now have template sizes.

ASSAULT WEAPONS (page 66)
"... infantry models armed with an assault weapon count as tough fighters (see page 91)."

FIXED WEAPONS (page 66)
Fixed weapons have a 45 degree arc to their front.  When issued an Advance order they can pivot on the spot (but do not move from their position), then can shot applying the -1 to hit penalty for moving.  To move a fixed weapon you must issue a Run order.

HIGH EXPLOSIVE (HE) (page 68)
Big change here, but in short HE now uses templates to determine who and how many are hit.

MULTIPLE HE TARGETS (page 70)
When a weapon system fires that uses HE and has multiple shots, the template are placed touching each other but not overlapping.

SHAPE CHARGE (page 73)
Much improved.  Shape Charge weapons do not pay the -1 penetration penalty for long range (they no longer suffer the negative to hit modifier).

CLOSE QUARTERS (page 76)
Not in the text, this is notable by the removed text.  Units engaging in Close Quarters no longer remove their pin markers.  When reacting with shooting, units with pins do not take an order test but also do not remove a pin marker (and suffer the negative to hit modifiers for having pins).

CLOSE QUARTERS DAMAGE ROLLS (page 79 and 80)
PEN and pins do not effect damage rolls in Close Quarters.  Exceptional damage also applies to Close Quarters.

YOU MEN, SNAP TO ACTION! (page 83)
When activating an officer, additional dice can be pulled from the dice bag to issue orders to friendly units within 6" of the officer.  The number of additional dice depend on the officer rank:

  • 2nd Lieutenant = 1 order die
  • 1st Lieutenant = 2 order dice
  • Captain = 3 order dice
  • Major = 4 order dice

Additionally, Captains and Majors can issue the orders to units within 12" (instead of 6").

GENEVA CONVENTION (page 83)
Medics can no longer carry weapons (but can defend themselves in Close Quarters).  Medics also cannot hold objectives.

FLAK (page 86)
Big changes here.  Flak units in Ambush that fire at aircraft retain their Ambush order.  Vehicles firing pintle-mounted flak weapons also do not count as open topped for the rest of the turn if firing at aircraft.

SNIPER (page 91)
Rifle range still goes out to 36" when shooting on a Fire or Ambush order, but any target closer than 12" is automatically missed.  Shooting still ignores negative to hit modifiers, except for pin markers and if the sniper team is missing the assistant.

VEHICLES AND MEASURING DISTANCE (page 99)
Measuring ranges to and from vehicles is now based on the hull position.

PINTLE-MOUNTED WEAPONS (page 105)
"Whenever a fully enclosed armoured vehicle fires a pintle-mounted weapon, against a ground target, the crew are exposing themselves to enemy small-arms fire, and thus the vehicle counts as open-topped until the end of the turn."

TURRET JAM (page 109)
When a damage result in inflicted against a vehicle that does not destroy it, a D6 is rolled and on the result of 4+ the turret gets jammed in place for the rest of the game.

Note:  This turret jam rule is absolute bullshit and stupid.  My group has already decide to take a black sharpie and redact the entire section of the rule book.

TRANSPORTS (page 114)
"Transport vehicles have a minimal crew, so they can only fire one of the weapons they are equipped with."  Firing additional vehicle weapons requires units to be mounted in the transport.

RECCE (page 118-119)
Same general function but much better written to avoid confusion.

BUILDINGS AND EXTRA PROTECTION (page 124)
Units get a +1 to their damage rating when being shot at in buildings (versus before when you would need a 6 to kill).

NOT ENOUGH ORDER DICE? (page 213)
An option here for playing larger games when you either have too few order dice or there are just far too many and games take forever.  In this case, you are just limiting the number of order dice per side to 12 ... after 12 the turn is over.

ASSAULTING THROUGH TERRAIN (page 79)
If you assault through terrain you still use a Run order, but only move 6" (just as if you where Advancing).

TOUGH FIGHTERS (page 91)
Tough fighters used to just get 2 attacked in close quarters.  Now, this has changed.  If a tough fighter scores a successful damage roll they can make a second (but not third) damage roll.

GUN SHIELDS (page 95)
A gun shield increases your damage rating by 1 when shot at from the front arc.

FIRING SMOKE (page 97)
When you miss with a smoke round the opponent can now place the smoke within 12" of the target point (used to be 6").  Additionally, when multiple launchers roll a hit when firing smoke they pick D3-1 additional points within 6" of the target point and place additional smoke clouds.

MULTIPLE ACTIVATIONS WITH A SINGLE DIE (page 218)
They've included a small section that addresses using group activation for larger games.

I think that covers most of the big changes to the core rules.  I'm sure I've missed a few things ... but I'd say in general there are several rules that are the same, but written clearer or more cleanly.

Now, I've not found an updated QRS ... so looks like I have to make one myself with the v2.0 changes.

Friday, November 18, 2016

Firestorm Armada After Action Report

Ok ... so this is a few weeks old now ... took me this long to get the post finished.  While I was busy I found it easy to play some easier to setup/tear down games.  One of those such games is Firestorm Armada by Spartan Games.

I've been slowly building up my fleets for this game.  I have my Sorylian Collective fleet that I've painted myself, a large Dindrenzi Federation fleet, a Ryushi fleet, and a Rense System Navy (RSN) fleet that I picked up off Ebay.

Anyways, I got together with Roy Scaife and we played a game using all 4 fleets ... with essentially the "patrol fleet" boxed sets for each ... with a little support to even up the points.

I actually had a lot of fun playing the game.  We were both a little rusty, but my rules reference sheets helped out a lot (along with my fleet rosters).  I played the Sorylians and Ryushi while Roy played the Dindrenzi and RSN.  Each of us started with our secondary fleets (Ryushi and RSN) off table and arriving using the reserves rules.  This favored me just a little as some of my squadrons arrived before Roys.  Mind you, those RSN squadrons are tough as nails ... when they did show up --- late thank god --- they started putting the smack down.  But, by then it was too late.  I focused by fire early on against the Dindrenzi battleship and it finally went down on turn three ... and my battleship was still functional.  My cruisers paid the price for that strategic decision, but it carried the game for me in the end as loosing a capital ship is a big points swing (I gain points while at the same time he looses points).

Pictures below of the action.


Alright ... back to historical stuff now :-)

Sunday, November 13, 2016

General Update - 11/13/2016

Well my oh my!!  My apologies to all my followers, I've been absolutely swamped by work and life in general.  I've been making progress, but unable to find the time to do blog posts during the same time.  The good news is I'm coming up for air.  With the Thanksgiving and Christmas holidays coming up here in the US I'll have time off to play games and finish up some projects.

I've got a few posts in progress covering a few different things, from new Russian vehicles for modern that are finished, to lots of spaceships for Firestorm Armada, and new ACW stuff that I've been working on for the Pickett's Charge scenario I'll be running at DundraCon.  In fact, next Sunday I'm looking to run the first play test of that scenario.

So ... coming back ... and apologies for the absence of posts ... and thanks for sticking with me!

Arriving on Monday is the new European church from Crescent Root Studio (order yours here).


Can wait ... this kit is just another notch in the bed post for Crescent Root's awesome range.

Lastly ... another reason for my lack of posting ... I added two new members of the family in K9 form ...

Jasper and Autumn
They are 1/2 Australian Cattle Dog and 1/2 German Shepard.

More to come soon!

Thursday, September 15, 2016

Modern Canadians Have Shipped Out!

Just a quick update today.  I've received shipping confirmation from Full Battle Rattle Miniatures that my modern Canadian infantry platoon has shipped out to me!!  Very excited to bring the Canadian Army to the tabletop.  This was what I was waiting for to put in the "final push" to get all the vehicles done.


I expect to have the Canadians fighting in the modern European theater by November, if not sooner.  This will round out my plan to build Russians, French, and Canadians.  Roy Scaife is doing USMC, British, and Russian airborne forces - which covers all the bases except for the Germans.  I know Empress Miniatures is working on modern Germans to add to their already large and excellent line of miniatures, so when they eventually get released those will get added into the mix as well.

For anyone looking at modern Canadians, head over to Full Battle Rattle Miniatures and gets yours now before they sell out!

Tuesday, September 13, 2016

Rethinking Napoleonics

The recent game of Sharpe's Practice at Pacificon got my creative juices flowing for Napoleonic's again.  My group has been happy with our adaptation of rules that combine Black Powder, Kings of War, and some house rules together, but ... there are still fundamental issues I have with Napoleonic wargaming in 28mm.  The good news is I have a way forward and I've excited to play test out some significant modifications to the "Empires at War" rules.  In fact, if all goes well, I'd say there will be little remaining in common with either Black Powder or Kings of War.


Cavalry and Charges

One of the most overlooked and mistreated aspects of Napoleonic wargaming, in my opinion of course, is cavalry.  I've seen all sorts of mistreatment - from a cavalry action on one flank that is essentially a game unto itself, until one side late in the game squeaks out an advantage (which may be pointless), to cavalry mixed in among infantry that forms square and shoots the cavalry to pieces, to cavalry charging into a unit, destroying it then sitting there doing nothing while getting blown away.  So ... what to do about all this?

Of course, for a rules set it is all about generalization and/or the 80/20 rule.  There are always exceptions to the rule of thumb, especially for a conflict that ran as long, and spanned as many armies and battles, as the Napoleonic Wars.  That being said, in general you would see small amounts of cavalry attached to brigades or divisions, with significant formations of cavalry being deployed to a flank position or - perhaps most commonly, in a reserve position behind the main line to react to enemy breakthroughs or to exploit opportunities.  With that in mind, my thinking here is to do the following:
  • "Full" cavalry formations are not deployed initially on the tabletop (unless there is significant space in the "rear area" of the table, but that is unlikely if you are playing 28mm.  Instead, they arrive later in the game.  Army commanders will roll a number of dice per turn.  Commander qualities will apply but be simple/straight forward ... either a command is poor, average, or good.  Let's say a command gets three dice (regardless of quality).  At the start of a turn, the commander rolls those three dice.  If the command is poor, they must discard results of 1, 2, or 3.  Average discard results of 1 or 2 and good commanders discard results of 1.  The remaining dice can be used for a few different things (and can be saved across turns, with a limit of 3 being saved and rolled over into the next turn).  It takes 4 of these command dice to call a reserve brigade (not just of cavalry, but any formation) onto the table in the "center" of the table (divide your side of the table into three sections, left, center, and right).  5 of these dice allow you to shift the entry point to either the left or right thirds.  An opponent on any turn following the entry of a reserve brigade, may use 4 dice to bring their brigade onto the table in the opposite sector (not additional dice required) - this representing the opposing formations reacting (if able given the number of dice) to the commitment of reserves.  I'll stop there, but that should paint a general picture of my intention to have cavalry act more like a reserve reaction/exploitation formation.  Cavalry units attached to infantry brigades would deploy normally with their brigades ... these rules would govern any reserve brigade, not just cavalry, but dedicated cavalry brigades would always start in reserve (unless specified differently by a scenario).
The second consideration I had was charges.  Loosing an entire cavalry brigade or division was career ending, potentially army ending, and certainly made headlines at the time.  As a result, many commanders were hesitant to commit cavalry unless desperate or confident of the outcome.  Lots of cavalry charges can be found throughout many battles, but commonly when a cavalry unit charged they would go as hard and far as they could ... then they'd be out of the battle ... if not permanently, at least for a significant amount of time while they reformed.  My thought here is:
  • Makes charges an "all or nothing" thing.  First, for cavalry specifically, rather than charging they can declare a "threatening" charge against an infantry formation (which burns their order/activation).  The cavalry unit does not move but the infantry unit is required to form square (of course, the cavalry have to be able to charge the unit following the normal rules).
  • For charges that do happen, use breakthroughs and fight melee normally, with victorious units either being required to declare another charge immediately following a victorious charge, or finishing their action "for the day."  Once the fighting is done and the unit has "gone the distance" - the unit must either consolidate on the position or withdraw, but either way, that unit is no longer capable of charging for the rest of the game.  This represents the big charge/push followed but such a level of disorganization and need for reforming that the unit is not destroyed, but other than defending itself, as spent itself for the portion of the battle being fought in the game.
Clearly all this needs to be play tested ... but hopefully the intention is clear.  Units didn't bounce around constantly in good order charging everything that moved or looked at them funny.  A charge was a big deal, and when done, was usually the end of the unit for many hours if not an entire day or battle (depending on the number of casualties sustained).

Ranks

The part of this is ranks.  Now, again, rule of thumb.  With so many armies and constant reorganizations occurring throughout the war, there is always an exception.  That being said, in general we can say that the British used the 2 rank system (ok, you can argue there was an incomplete third rank in some cases being used to replace casualties, but the primary formation was a 2 rank system).  Most everyone else used the trusty old 3 rank system.  Although this is a well known fact about Napoleonic formations, I've never seen this employed on the tabletop.

First, I've decided to shift my collection to a 1:20 (or so) figure scale.  This means I'll use 36 figure battalions for the French (for example).  I've seen many use this figure ratio and unit size, but they base the figures normally 3 wide by 2 deep.  I've decided instead to use the three rank system, and base each "company" 2 wide and 3 deep.  Pictures below of what I mean ...

Line formation.

Line formation.

Attack column.

Attack column.

Anyways, that occupied my thinking this past week ... and my first unit to get converted over is some relatively new miniatures from Perry Miniatures that I needed to base anyways.

In other news, I've submitted a large order to Perry Miniatures for a Russian army, and for lots of casualties and battlefield extras (wagons, ambulance, etc.).  I'm also going to finally wrap up the last touches on my Austrian army (which is rather large) --- which is significant as those units are going from 24 figures to 48!

Monday, September 5, 2016

Pacificon Game Expo 2016 Convention Report

Well, another convention completed. I was really looking forward to this with all the work I crammed into the last couple of weeks to prepare.  I played/ran several games and had a blast.  The miniatures room was extremely busy all weekend, which is great to see.

Before jumping into the many pictures I took, I did take a short video while I was playing in a Sharpe's Practice game. It pans around the room and you can see it is busy - even though this was during Saturday afternoon, this was representative of Friday, Saturday, and Sunday.  I'd even argue that Sunday was the busiest.


Russia Resurgent

This game was based around a small French forces positioned at the edge of a French town on the border.  The Russians managed to break through the Fulda Gap and pushed to the French border before the NATO nations could get reinforcements into the European theater of operations. The Russia orders where simple, use superior numbers and rapid advance to overwhelm the enemy forces - or suffer the ill report of the political officer!  The French had to hold the town and slow down the Russians as much as they could.

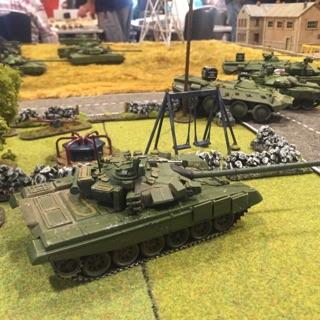
You can see all sorts of new stuff I did for this table: high tension electrical power lines, new trees/bases, paved roads, French armour, playground (needs more work), and more!


Downtown Baghdad

This scenario was different from what I've been running for Operation Iraqi Freedom.  A senior Iraqi official for the newly created provisional Iraqi government is attending a "hearts and minds" event - trying to make things look like they are getting better. The press and many civilians are in a small park/square with a mixed USMC and British Army contingent providing a security perimeter. The former Iraqi army and insurgents have planned to start their insurgency by capturing the Iraqi VIP so he can be executed in a video for propaganda.  The coalition forces must evacuate the VIP to safety if the situation becomes too dangerous.

The primary egress route was compromised by an IED, so the VIP had to be evacuated through the secondary route.  The coalition suffered several casualties, including losing a Warrior IFV, but managed to pull off a minor victory.


Sharpe's Practice

This game was put on by the famous Adam Clark (http://adam-clark.com). I played as one of three French players, running the left flank with Dragoons, Lancers, and a small Grenadier unit. My flank saw a lot of action early, with my Lancers jumping out early to route the British Hussars, but then being shot into oblivion by British infantry and riflemen.  The battle then shifted to the other sectors, with the final action taking part in the center.  British victory.


WW2 Late War (Bolt Action)

Roy Scaife ran a great game for Bolt Action WW2. This was late war, with the US forces advancing into Germany and facing mixed German resistance. The US pushed hard but in the end the Germans managed to push them off for the day.  The US, pushed back by superior armour, fell back and called in the air corps. I was a bonehead on this one and completely forgot to take lots of pictures, so I only and a small number (also, my phone was charging at the time).


54mm Wooden Wars Imaginations

The awesomely creative Thomas Foss (http://skullandcrown.blogspot.com) ran his 54mm Imagination game (essentially WSS).  Every single miniature in this game, and game aid, is laser cut. It is a truly unique game, plays easy and fast, and is very fun. I played a brigade on the left flank, helping defend a city.  I was rolling hot (using someone else's dice, not mine!) and managed to roll the advancing flank opposite me.  Had a blast - as is guaranteed at a game Thomas is running.


Other Games

Below is an assortment of some others games I took pictures of - two key ones being an impressively large and outstandingly painted Wargods game - using the Clash of Iron rules.  Another great game was Alamo - which you can see below and in the video at the top of this post.


Well, that is about it ... also played lots of board games.  I hope you enjoyed all the pictures.  Now I can get back to some regular projects and get more gaming happening!