Monday, August 24, 2015

Hell's Highway Update - New German Vehicles

I got my vehicles back from the weathering master Seth Amsden and they look great.  This completes the German vehicles that I need for my Hell's Highway game I'll be running at the Pacificon Game Expo on September 5th.

I'm really happy to see my custom build Bergepanther all done.  Pictures below as usual.

Bergepanther

Bergepanther

Bergepanther

Bergepanther

Panzer III
#223

Panzer III
#223

Panzer III
#224

Panzer III
#224

Panzer IV
#233

Panzer IV
#233

Panzer IV
#232

Panzer IV
#232

Panzer VI "Tiger"
#121

Panzer VI "Tiger"
#121

Panzer VI "Tiger"
#122

Panzer VI "Tiger"
#122

I just finished painting camo and doing the decals on the bulk of the British vehicles yesterday and they've been dropped off to Seth for more of his master weathering ... so looking forward to getting those back soon.  I still have to finish some universal carriers - they slowed me down because I have to paint the crew before I have glue the fronts of the hull on ... so getting there.  Bouncing between painting the crews now and painting ships for the Lepanto game I'm also helping with at the upcoming convention ... so steady progress.

Sunday, August 16, 2015

Galleys, Guns & Glory AAR - Somewhere In The Mediterranean

Ahoy!  I was able to get in a game of Galleys, Guns & Glory today with Dan Kerrick.  I pulled out the majority of the fleets I have done for each side (and combination on my own painting and ships I commissioned with Thomas Foss).  I finished painting my Galleass recently and used it during this game in the center command for the Holy League fleet.  After sorting out the crew for each ship, laying down my sea mat and pulling out some dice it was off to battle.

Order Of Battle - Christian Fleet

  • Right Wing
    • 1 x Lanterna - Knights of Malta
    • 2 x Galley - Knights of Malta
  • Center
    • 1 x Galleass - Venetian
    • 2 x Galley - Venetian
    • 2 x Galley - Spanish
  • Left Wing
    • 2 x Galley - Venetian
    • 1 x Galley - Genoa
  • Reserve
    • 1 x Galley - Papal
    • 2 x Galliot - Knights of Malta
    • 1 x Galliot - Genoa

Order of Battle - Ottoman Empire


  • Right Wing
    • 2 x Galley
    • 3 x Galliot
  • Center
    • 1 x Lanterna
    • 4 x Galley
    • 2 x Galliot
  • Left Wing
    • 2 x Galley
    • 3 x Galliot
  • Reserve
    • 2 x Galley
    • 3 x Galliot

We played 5 turns.  On the Christian right wing the Turkish ships came on strong.  Firing was conducted primarily at long range with very limited effects.  The Knights of Malta proved their resiliency in melee as the Turkish ships first rammed then boarded the Maltese ships but were repelled.  By turn 4 the Turkish left wing had collapsed with all ships est ablaze!

The Christian left wing was a little touch and go due to effective fire from the closing Turkish ships, however the Venetian Lanterna made all the difference in bringing the flank under control and breaking the Turkish right wing, but at a cost of the Venetian and Genoa galleys.

The center was hard fought.  The Christian reserve angled for the gap between the center and right wings, but was met by flaming Venetian and Turkish galleys screening the flank of the advance of the Turkish center.  The Galleass was lucky enough to close with the nearest Turkish galleys and unleash several volleys due to good rolling on the reloads.  Unfortunately the central Turkish galleys were able to ram and board the two Venetian galleys and set them ablaze.  Both Spanish galleys from the center were reduced to their last crew.  The Turkish galleys all angled towards the Venetian Galleass, which by the end of the game was about to be boarded by superior numbers.  Unfortunately due to burning wrecks the Christian reserve wing would not arrive in time to do much to support the deteriorating situation in the center.

That all being said, at the end of the day the Turkish left and right wings were routed and there was enough left over in the Christian center to hold until the left and right Christian wings could sweep the Turkish flanks.  At the end of turn 5 we called it a Christian victory.

Lots of pictures below of the action ...

My newly painted Venetian Galleass ready for action.

Christian fleet deployment.


Turkish fleet deployment.


Dan activating his central fleet group.


Knights of Malta ready to avenge the loss of their
post-Crusades home island!

Turkish left wing is repelled
by the Knights of Malta.

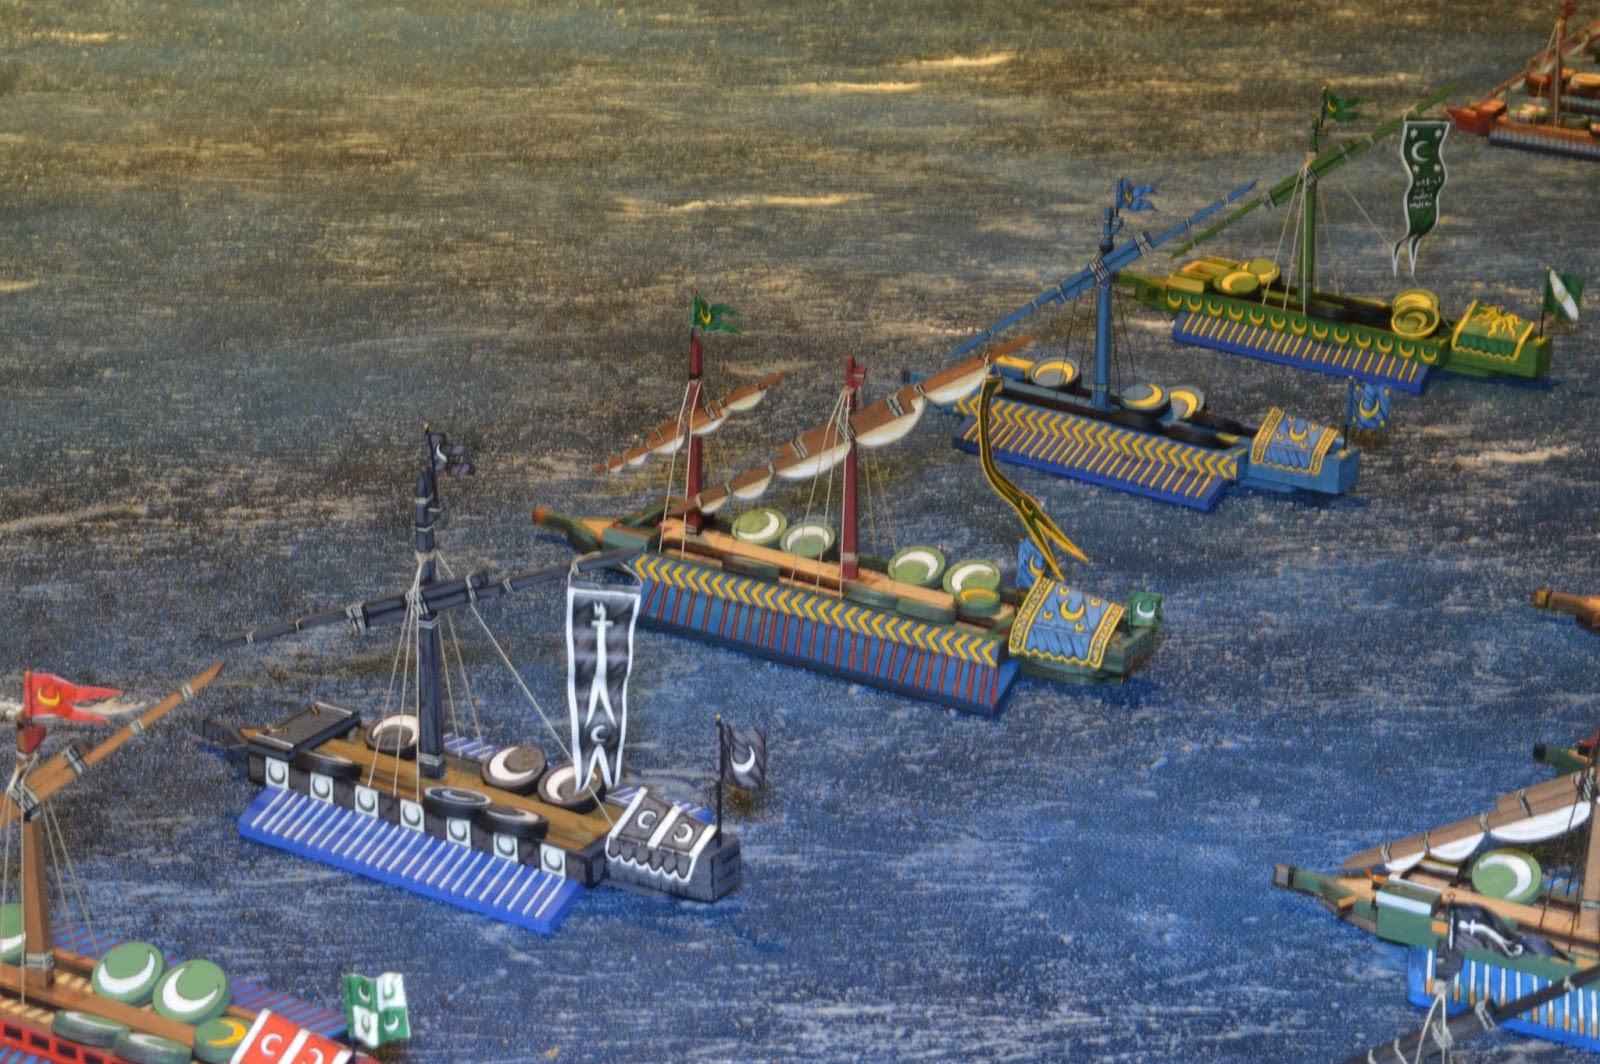
The Venetian Galleass is faced with overwhelming odds
as the Turkish center and reserve wings close
with burning ships screening their flanks.

The battle becomes a mash of
ships and boarding actions.

The moments before the Turkish left wing
crashes into the Christian right wing.


The Venetian Lanterna on the left wing crashes
into the last remaining galley on the Turkish right.


The Galleass is isolated from support and about to be
boarded by superior numbers!

A great game overall.  I know Thomas is quickly putting the final touches on the rules.  I have more ships to paint for both sides and lots of crew to reorganize and touch up.  I should have around 30 ships per side (perhaps a few more than that) one it is all said and done.  This game took us (both first time players) around 3 hours (with just about 40 ships on the table).  I'd say that is really good!

Onward to our Lepanto game at the Pacificon Game Expo and back to putting decals on British vehicles for my Hell's Highway game!

Tuesday, August 11, 2015

Painting A 1:300 Renaissance Galley

I'm excited for the Pacificon Game Expo that is coming up on September 4-7.  One of the big games I'll be co-running and playing in is a battle of Lepanto game done at 1/4 size (that's a heck of a lot of ships!).  I'll be bringing my 46-50 ships - currently I have 46 done (42 done by commission by Thomas Foss and 4 ships I've done myself since getting them last week).  This game is fast paced, fun and deadly - I'm really looking forward to it!

A Venetian Galley with the wind at its back.

So, what about these ships then?  Skull & Crown offers a full range of laser cut birch plywood ships that cover all the main ships and factions involved in the period (Venetians, Spanish, Papal States, Genoa, Knights of Malta, Turks and Corsairs).  There are ship models for Galleass, Lanternas, Galleys and Galiots (and Fustas which don't have any game effect but are used behind the ships to hold two dice indicating how many hull points remain).

In this post I'm going to paint up a regular Turkish Galley.  The pictures below along with their captions will guide you through the steps I used to paint up this particular Galley.  I've also included some additional photos of the other Galleys I've painted up as well.  All paint references are for Wargames Foundry paints unless otherwise specified.

This is what you get in a single Galley model kit.  There
are several different sets of color sheets for each of
the factions as well as different crew markers.  You can
choose to use a mast with or without sails.

Step 1:  I do two coats of a brown wash over the wooden
deck areas of the Galley and Fusta.  The first coat absorbs
into the wood while the second will fill in the details
stronger than the first coat.

Step 2:  I assemble the hulls.  The washed wooden deck
is now mush cleaner than before.  Only the mast remains
separate at this point.

Step 3:  Paint the base colors you've chosen for the ship.  In
this example I'm using Foundry paints: Prussian Gun
Mid Blue 106A (Shade) and Yellow 2A (Shade).

Step 4:  Paint the deck details, specifically the cannon
barrels, cannon chassis for the central gun and the
bow spur (ram) - which I paint base black then highlight.
Again Foundry paints are used:
Gold 36C (Shiny - I mix mine with a significant
portion of silver when I get the pot from Foundry),
Red Oxide 102C (Light) for the chassis and
Charcoal Black 34B (spur highlight).

Step 5:  I highlight the deck colors using:
Prussian Gun Mid Blue 106C (Light) and Yellow 2C (Light).

Step 6:  I paint the water blue and give it a black wash
to fill the details around the oars:
Deep Blue 20C (Light) and GW Black wash.

Step 7:  I paint the base color on the oars and then highlight
them.  I also repaint the base color on the water leaving
the black washed part as an outline:
Deep Blue 20C (Light), Yellow 2A (Shade) for the
base oar color and Yellow 2C (Light) to highlight the oars.

Step 8:  Cut out and attach the flag sheet (paper) details.
This includes the two flags, awning for the stern of the
Galley, and the details running down the sides of the hull.
I use white glue to attach the details - DO NOT use
super glue as it saturates and darkens the paper which
results in an uneven coloring in the paper.  To get the
"wavy" effect in the flags, after I glue them and get
them affixed to the metal pins, I use the handle of a
thin paint brush, wrapping the flag around the handle
at different points.

Step 9:  Onto the crew.Paint the back of the circles black,
flip it over and use a heavy black wash on the front details
of the crew markers.  Note that here I've washed the
five boarding crew markers, the Captain marker and the
prize (captured ship) marker.  Second, I use a base grey
color on the smoke marker:
GW Black Wash and Slate Grey 32B.

Step 10:  Paint the base colors on the crew, captain and
prize markers.  I paint the base color on the mast while
using black on the rope/rigging line areas:
Prussian Gun Mid Blue 106A (Shade),
Yellow 2A (Shade) and GW Black.

Step 11:  Several things going on here.  Firstly, I paint the
highlights on the mast, paint the rope/rigging lines on the
mast and affix the flag to the top of the mast.  I then paint
the edges of the markers black after punching them out of
their sprue.  I painted the top of the flag poles gold.  I
speckle a light grey and white on the smoke marker to
give a layered look to the smoke marker.
Prussian Gun Mid Blue 106C (Light), GW Screaming Skull
(rope/rigging lines), Gold 36C (Shiny) for the flag pole tops,
GW Black, Slate Grey 32C and White (smoke marker). 

Step 12:  For the rigging I use black thread (from a sewing
kit).  There are pre cut holes in the hull for the rigging
points.  I use a dab of super glue to fill the hole, then I
stick the end of the thread into the hole.  I let it set for
a minute than I raise the thread above the top of the mast
and cut it at about an inch or so above the tip of the top
of the mast.  I then use tweezers (cause I have big dumbo
fingers) to tie off the thread just above the cross section.
Once tied off I use another small dab of super glue to hold
the top of the thread and cut off any excess thread using
my exacto knife.  I do this for the three rigging lines
either side of the hull and for the stern rigging line.
After taking these photos I actual used GW Screaming Skull
to highlight the rigging lines which I like better than
just leaving them black as pictured.

The finished product.  A Turkish Galley ready for action!

Another Turkish Galley.  I used Foundry French Dragoon
Green 70A & C as the color for this ship.

For this Turkish Galley I used black with a highlight
using Foundry Charcoal Black 34B.

If you want to see the large number (42) of ships Thomas Foss did for me, check out his post here (here be more pictures!).

So there you have it folks.  That is how I'm painting up my ships for Galleys, Guns & Glory!  I'm really happy with the results.  Pictures don't do the ships justice when you see a fleet arrayed before you and ready for action!  I'll of course post lots of pictures from Pacificon of the many games I'll be playing in and running.