Hello all,
While going to look for yet another construction diagram on the Warlord site and decided I would just put all the useful links for Bolt Action in one place so I can stop attempting to search for them or root page-by-page through their Bolt Action articles (currently 31 pages, joy!).
So here you go, a set of links for construction diagrams and other handy articles:
LAST UPDATED: 2/26/2014
Construction Diagrams - German
Stug III Ausf. G 7.5cm Assault Gun
Stug III Ausf. G with Saukopt (Pig's Snout) Mantlet
Sturmhaubitze 42 10.5cm Assault Gun
Tiger I Ausf. E & Michael Wittmann
Sd.Kfz.222 Armoured Car
2cm Flakvierling 38
Waffen-SS Quad Flak
Kradschutzen Motorcycle and Sidecar (1939-1942)
Kradschutzen Motorcycle (1939-1942)
Early Production Tiger I
Sturmtiger
Sd.Kfz.234/2 Puma Armoured Car
Panzer II Ausf. A/B/C
Jagdpanther
Waffen-SS Nebelwerfer
Sd.Kfz.251/8 Ambulance
Sd.Kfz.251/16 Flammpanzerwagen
88mm FlaK 36
Fallschirmjager 2.8cm SPZB 41 Anti-Tank Gun
Howling Cow Schweres Wurfgerat 41 Rocket Launcher
Hetzer Tank Hunter
Construction Diagrams - British
QF 40mm Bofors AA Gun
Morris C9/B with 40mm Bofors
SAS Armoured Jeep (Northwest Europe)
SAS Jeep (Northwest Europe)
Airborne 75mm Pack Howitzer
Humber Scout Car
Sherman V Tank
Cromwell MkIV Cruiser Tank
25pdr Howitzer and Limber
Airborne 6pdr Anti-Tank Gun
6pdr Anti-Tank Gun
Universal Carrier
Construction Diagrams - Soviet
GAZ 98 Aerosan
ZIS-3 Divisional Gun
ZIS-2 Anti-Tank Gun
Construction Diagrams - USA
M2A1 105mm Howitzer
M8 Greyhound
M24 Chaffee Light Tank
Airborne 57mm Anti-Tank Gun
M1 57mm Anti-Tank Gun
M26 Pershing Heavy Tank
Construction Diagrams - Japan
Chi-Ha Type 97 Tank
Rules Updates/Articles
Updated: Bolt Action FAQ and Playsheet
Updated: Bolt Action FAQ and Tournament Pack
Scenario: Bunker Assault
Scenario: Iwo Jima Bunker Assault
Scenario: Alligator Creek, Guadalcanal
Rules: Amphibious Landings
Modelling & Painting Guides
Building the Pegasus Bridge Battleboard
Painting Guide: Cafe Gondree and Bunker
Painting Pegasus Bridge
Painting Waffen-SS Plane Tree Camouflage
Painting a Hanomag Part 1: Assembly
Painting a Hanomag Part 2: Spraying and Painting
Painting a Hanomag Part 3: Transfer and Finish
Painting Guide: Using the Bolt Action Spray Primers
Video: Painting Bolt Action Plastic Soviet Infantry
Video: Painting Bolt Action Plastic German Infantry
Speed Painting US Marine Corps Infantry
Painting USMC Camo Tutorial
Speed Painting Japanese Infantry
Hopefully this reference saves you some time and is helpful!
Friday, January 31, 2014
Thursday, January 30, 2014
WW2 West Front Town Project Update #2
A quick update on some progress ... nearing completion of the hotel complex. I still need to use the base paints to patch up the 2nd and 3rd floors - and I'm waiting on my 4Ground order with the additional roofing tiles I need to finish the roof for the two main hotel buildings - and to drybrush/tuff the dirt around the sides. The sidewalk, hedges, and static grass is down for the main part ... and the cookhouse and stable roofs are done with the roofing tiles. Getting near completion on this particular item. Pictures below.


Steady progress -- starting to come together!
Steady progress -- starting to come together!
Monday, January 27, 2014
German Checkpoint
Hello all,
Just a quicky - I finished up my German checkpoint over the weekend. This will be used in my west front town setup I'm working on ... it is nice to have some small little parts like this to add a little flavor to the town and break up the monotony of the buildings and such. Pictures below.
Just a quicky - I finished up my German checkpoint over the weekend. This will be used in my west front town setup I'm working on ... it is nice to have some small little parts like this to add a little flavor to the town and break up the monotony of the buildings and such. Pictures below.
NOTE: Not speaking any German myself (clearly!) I just followed the lines that are burned into the wood ... which includes the two dots above the "A" in "HALT" --- I've since filled in the two dots and now it is properly German. Thanks to those who pointed it out! :-)
 |
| Finished up the checkpoint. The shack and guard rail is from 4Ground. The road part was done using the cobblestone template and base render from 4Ground's 15mm line (made it wider for 28mm). |
 |
| On the board, the road lines up with the modular cobblestone roads I have - it just inserts between two of the sections. |
Sunday, January 26, 2014
Making Bocage For 28mm World War 2
Hello all,
Here is a little "how to" on making bocage for your 28mm WW2 wargames. I'll be using this for my Bolt Action games and have several lengths in progress (12", 6", 4", some with gates, and corners). The finished product looks like the pictures below ...
Here is what you'll need:
Next I use the plaster to fill in the gap between the edge of the base and the 1/2 round wood strip.
Next I use the stone pebbles to glue some rock clusters to the base.
Sand the base - spread white glue and dip in the fine grain sand.
Next is to build the frame that will be used to glue the clump foliage into the shape of a bush/wall. Use the drill to drill holes into the center of the base every 3 inches. Then cut the balsa wood round pegs to fit the holes - I put my total height from the bottom of the base to the top of the balsa peg at 1.5 inches.
Use the square/rectangle strips of balsa to build a top run for the frame.
Next it is ready for painting. Spray paint the whole thing black, then finish the base and rocks.
Next it is time to use the hot glue gun to glue the clump foliage onto the frame. As you get little gaps here and there you can use super glue to glue in bits to fill those holes -- better to use super glue and avoid the runs/spider webs that are inevitable with glue guns. I also got back after I'm done with tweezers to remove any spider webs of hot (now dry/cold) glue that are visible.
Here is a little "how to" on making bocage for your 28mm WW2 wargames. I'll be using this for my Bolt Action games and have several lengths in progress (12", 6", 4", some with gates, and corners). The finished product looks like the pictures below ...
 |
| The finished product. StuG III G shown is from Warlord Games. |
 |
| From another angle. |
Here is what you'll need:
- Woodland Scenics clump foliage (two colours - dark and light green).
- Stone pebbles from your local pet store (for a fish tank).
- 1/8th inch round balsa wood for "pegs" (frame for clump foliage).
- Square/rectangle balsa wood for creating a frame for the clump foliage.
- Drill with 1/8th inch bit.
- Hot glue gun.
- Super glue.
- Black spray paint.
- Paint and paint brushes for drybrushing the base and rocks.
- Thick cardboard for the base (I use mapboard).
- 1/2 round wood strip.
- Wallboard joint compound (plaster).
- Sand for basing.
- White glue and super glue.
The first think I did is cut down a 12" strip of the 1/2 round wood strip and also a 1" wide by 12" strip of the mapboard to create the base. I super glued the 1/2 round wood strip to the base. Since it is wood, you don't have to worry about the cardboard base warping after painting and such.
 |
| Cut the cardboard base and 1/2 round wood strip. The above is a straight 12" length. |
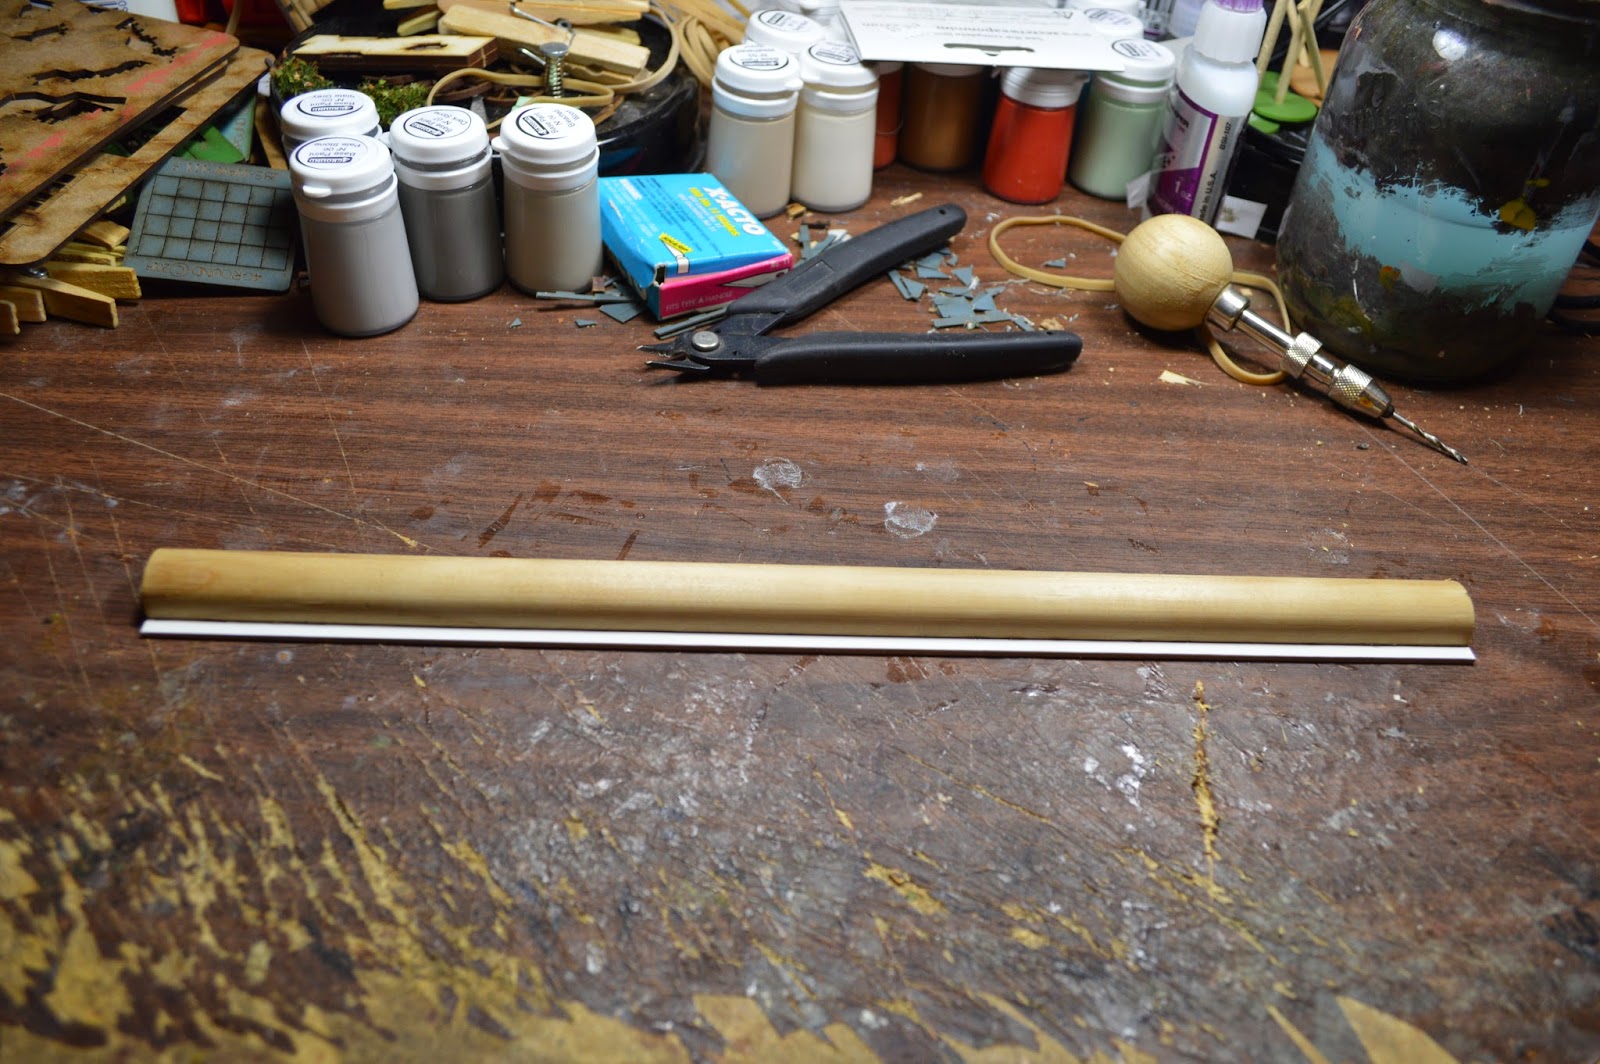 |
| Glue to two together using super glue. |
 |
| A closer look, make sure there is a bit of a lip either side of the wood strip. |
Next I use the plaster to fill in the gap between the edge of the base and the 1/2 round wood strip.
 |
| I get the per-mixed plaster from my local hardware store. |
 |
| Fill in the gap between the edge of the base and the 1/2 round wood strip on each side. |
 |
| Do the next step before the plaster sets. |
Next I use the stone pebbles to glue some rock clusters to the base.
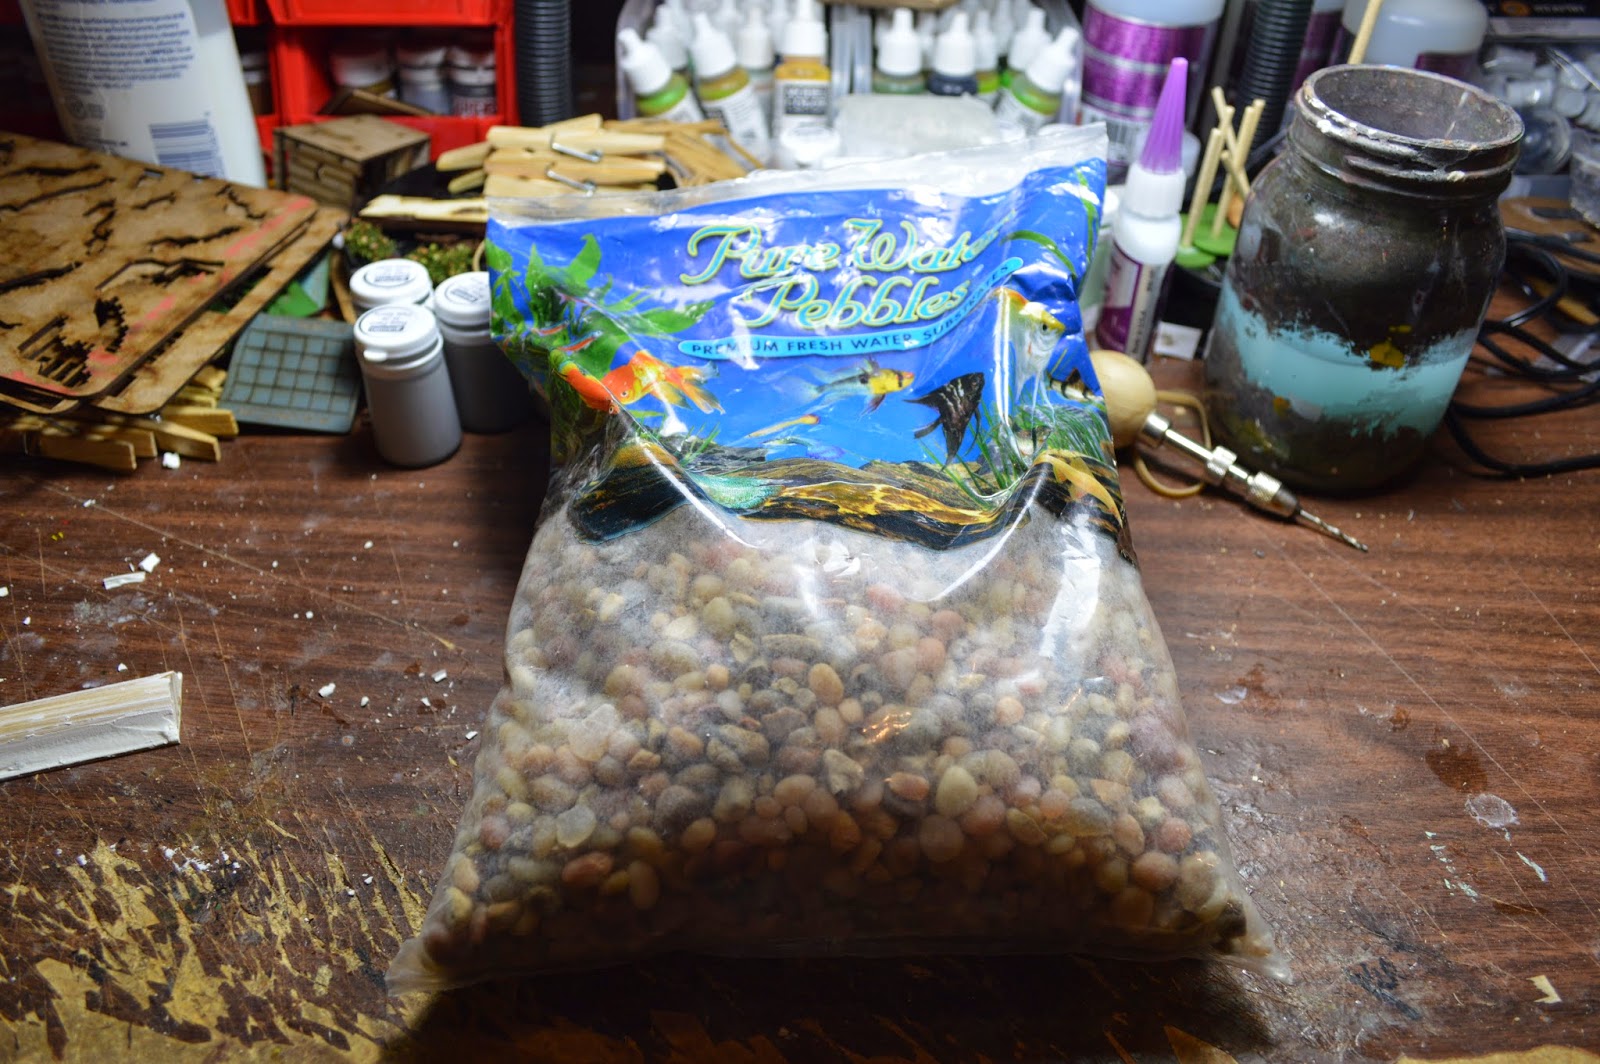 |
| Very inexpensive - get fish tank stones from your local pet store. |
 |
| Glue some rocks down to the base - the plaster should not be dry yet - allowing you to push the rocks into the plaster when necessary. |
Sand the base - spread white glue and dip in the fine grain sand.
 |
| All sanded and dry. |
Next is to build the frame that will be used to glue the clump foliage into the shape of a bush/wall. Use the drill to drill holes into the center of the base every 3 inches. Then cut the balsa wood round pegs to fit the holes - I put my total height from the bottom of the base to the top of the balsa peg at 1.5 inches.
 |
| Drill the holes for the balsa pegs. |
 |
| Glue the pegs into the holes - height to the top of the pegs is 1.5 inches. |
Use the square/rectangle strips of balsa to build a top run for the frame.
 |
| Both sides get two strips of balsa to build out the frame for the clump foliage. |
Next it is ready for painting. Spray paint the whole thing black, then finish the base and rocks.
 |
| Spray painted black - make sure to get the frame completely black so it isn't seen through the clump foliage. |
 |
| I used GW Rhinox Hide, GW Steel Legion Drab, and Foundry Base Sand 10C for the "dirt" and Foundry Slate Grey A, B, and C for the rocks. |
 |
| Painting finished. |
 |
| Hot glue gun time - have extra glue sticks and lots of clump foliage at the ready. I start at one end, do the top, then work my way around the sides, then the very bottom - the gap between the base and bottom of the frame. |
 |
| The finished product - side A. |
 |
| The finished product - side B. |
The last thing that should be done is to spray the clump foliage with a 50/50 mix of water and white glue to prevent the foliage from falling off easily. You could also spray it with clear coat, but that is less effective as it only coats the outside of the clump foliage --- the water/glue mix soaks into the foliage and is far more effective.
I'll need to trim the foliage at the ends a bit when I complete more sections so that they fit tightly together.
Hope this was useful!
Friday, January 24, 2014
WW2 West Front Town Project Update #1
Ok, so the drive is on - all those 4Ground buildings I bought are being assembled (many already completed) and I've already submitted the game for the KublaCon game convention that is coming up on the long weekend in May. I'll be running the scenario on a 6'x6' table and there will be 30+ 4Ground 28mm buildings in use on the table - it should be one hell of a sight!
Here is what is underway at the moment (there are five buildings not pictured that are being assembled on the bench - another "block" like is pictures in the middle left of the below photo).
The layout will include the factory (three stories), police station (two stories), and brick three-story houses from the "Whitechapel To Baker Street" range, the hotel complex, and almost every building, some in multiples, from the "World At War" range.
I have finished the basic assembly of the hotel complex, now on to the details.
The "details" now are to use the 4Ground roof strips to overlay the roof and make it look even better - and to use the 4Ground base paints to patch up the corners and such with paint. I've managed to finish the stone coaching stable and you can see the results below:


Hopefully you agree - as good as the base building looks out of the box, the added time to enhance the roof and touch up the paint is well worth it!
I'm cutting all the MDF bases for many buildings this weekend (including some buildings for Muskets & Tomahawks from 4Ground) ... I'll be posting progress regularly as this project is in full swing! In addition to the many 4Ground buildings, I'm adding extra scenery for my WW2 layout that includes:
More updates to come, tons of progress is getting made.
Here is what is underway at the moment (there are five buildings not pictured that are being assembled on the bench - another "block" like is pictures in the middle left of the below photo).
 |
| 4Ground is my friend! Getting ready to finish building and mount all of these lovely buildings to MDF bases. |
The layout will include the factory (three stories), police station (two stories), and brick three-story houses from the "Whitechapel To Baker Street" range, the hotel complex, and almost every building, some in multiples, from the "World At War" range.
I have finished the basic assembly of the hotel complex, now on to the details.
 |
| An AWESOME hotel complex. |
 |
| As awesome as the outside is, the inside is even better! |
The "details" now are to use the 4Ground roof strips to overlay the roof and make it look even better - and to use the 4Ground base paints to patch up the corners and such with paint. I've managed to finish the stone coaching stable and you can see the results below:
Hopefully you agree - as good as the base building looks out of the box, the added time to enhance the roof and touch up the paint is well worth it!
I'm cutting all the MDF bases for many buildings this weekend (including some buildings for Muskets & Tomahawks from 4Ground) ... I'll be posting progress regularly as this project is in full swing! In addition to the many 4Ground buildings, I'm adding extra scenery for my WW2 layout that includes:
- Custom bocage (I'll be posting a how to on making it).
- Custom smoke markers.
- Custom blast markers.
- Customer pin markers.
- Signs, telephone poles, and other odds and bits.
More updates to come, tons of progress is getting made.
Monday, January 20, 2014
Bolt Action Action - British/US vs. Germans
I was able to take advantage of a day off from work to play another game of Bolt Action. Matt Hilzendrager, Roy Scaife, Tibor Ipvavic, and myself played. It was Matt and Tibor's first game of Bolt Action so we introduced them to the rules with a basic point defense scenario (similar to the last one we played).
Matt brought along some very excellently painted SS troops so we used those and reinforced them with my regular German Heer. Below are the forces we used.
German Army Order Of Battle
Officer, Veteran, 2nd Lieutenant (SS)
SS Squad, Veteran, NCO + 7 men, 1xSMG, 1xAR, 1xPanzerfaust, AT Grenades
SS Squad, Veteran, NCO + 7 men, 1xSMG, 1xAR, 1xPanzerfaust, AT Grenades
Heer Squad, Regular, NCO + 9 men, 1xSMG, 1xLMG, 1xPanzerfaust, AT Grenades
Heer MMG Team, Regular
Heer Medium Mortar Team, Regular, Spotter
Sdkfz 222 Armoured Car
Sdkfz 234 Puma Armoured Car
Panther G
StuG III G
US Army Order Of Battle
Officer, Regular, 1st Lieutenant
Infantry Section, NCO + 11 men, 1xSMG, 1xLMG, AT Grenades
Infantry Section, NCO + 11 men, 1xSMG, 1xLMG, AT Grenades
Infantry Section, NCO + 11 men, 1xSMG, 1xLMG, AT Grenades
Bazooka Team, Regular
HMG Team, Regular
Light Mortar Team, Regular
Sherman M4A3 75mm
M5A1 Stuart Light Tank
M8 Greyhound Armoured Car
British Army Order Of Battle
Officer, Regular, 2nd Lieutenant, +2 regular men
Infantry Section, NCO + 9 men, 1xSMG, 1xLMG, AT Grenades
Infantry Section, NCO + 9 men, 1xSMG, 1xLMG, AT Grenades
MMG Team, Regular
Medium Mortar Team, Regular
PIAT Team, Regular
Sherman Firefly VC
2 x Cromwell Tanks
I have just one building left to build to complete the "hotel complex" that is sold by 4Ground - but I decided we could use it anyways for today's battle as it would provide a nice primary objective for the allies. Matt brought a couple of swamp mats he has and so we employed those as well on the table (light cover, marsh, no run orders). The SS would hold the hotel area along with the Panther and Heer MMG team. The recce section (the 222 and 234) would go to whichever side they became needed most (this would be the hotel side), and the remaining Heer units (mortar, infantry squad) and the StuG would hold the church on the right flank. The allies entered from the table edge on the first turn with the British entering around the dirt road ahead of the church and the US entering the main cobblestone road ahead of the hotel.
Both Roy and I had to attend to family in the evening so we called the game a little early - but it was clear that the Germans couldn't prevent the allies from taking 1-2 objectives at a minimum. The Germans would have fared better, but superficial damage and failed penetrations would haunt too many shots.
Here are some pictures form the game.
It was at this time that both Roy and I had to attend to our fatherly duties and pickup kids and feed them and the sorts ... with it being a school day tomorrow. For a large game with two new guys playing, and lots of side discussion, we got to the point where we could call it ... the tide was swinging full bore towards an allied victory. The best part, Matt and Tibor loved the rules and are now hooked on Bolt Action!
Onward to more Bolt Action!
Panther G
StuG III G
US Army Order Of Battle
Officer, Regular, 1st Lieutenant
Infantry Section, NCO + 11 men, 1xSMG, 1xLMG, AT Grenades
Infantry Section, NCO + 11 men, 1xSMG, 1xLMG, AT Grenades
Infantry Section, NCO + 11 men, 1xSMG, 1xLMG, AT Grenades
Bazooka Team, Regular
HMG Team, Regular
Light Mortar Team, Regular
Sherman M4A3 75mm
M5A1 Stuart Light Tank
M8 Greyhound Armoured Car
British Army Order Of Battle
Officer, Regular, 2nd Lieutenant, +2 regular men
Infantry Section, NCO + 9 men, 1xSMG, 1xLMG, AT Grenades
Infantry Section, NCO + 9 men, 1xSMG, 1xLMG, AT Grenades
MMG Team, Regular
Medium Mortar Team, Regular
PIAT Team, Regular
Sherman Firefly VC
2 x Cromwell Tanks
I have just one building left to build to complete the "hotel complex" that is sold by 4Ground - but I decided we could use it anyways for today's battle as it would provide a nice primary objective for the allies. Matt brought a couple of swamp mats he has and so we employed those as well on the table (light cover, marsh, no run orders). The SS would hold the hotel area along with the Panther and Heer MMG team. The recce section (the 222 and 234) would go to whichever side they became needed most (this would be the hotel side), and the remaining Heer units (mortar, infantry squad) and the StuG would hold the church on the right flank. The allies entered from the table edge on the first turn with the British entering around the dirt road ahead of the church and the US entering the main cobblestone road ahead of the hotel.
Both Roy and I had to attend to family in the evening so we called the game a little early - but it was clear that the Germans couldn't prevent the allies from taking 1-2 objectives at a minimum. The Germans would have fared better, but superficial damage and failed penetrations would haunt too many shots.
Here are some pictures form the game.
 |
| Starting off the game. |
 |
| An SS squad with the officer advances across around the corner of the hotel while the Puma waits to pounce. |
 |
| The Panther starts near the hotel side road - needing to move up to engage allied armour. |
 |
| Matt takes some shots with his iPhone while Roy ponders the allied strategy. |
 |
| The Sdkfz 222 supports the SS squads and forces the M8 Greyhound to recce back from whence it came. |
 |
| A great shot of the StuG III G laying in wait. It ended up moving forward to engage the advancing Cromwells but failed to knock either out (superficial damage only). |
 |
| The Puma waits to see where it is needed - it would move up the left road to engage the US recce (M8 Greyhound). I used the 222 to burn the recce reaction move on the M8, moved up the Puma, and on *two* occasions failed to penetrate after hitting (rolled 1's). Argh! |
 |
| The SS squad waits to the Panther to move forward before crossing the road to guard it's flank from advancing US infantry. |
 |
| The British arrive on board - choosing to use cover wisely given all the nasty German armour that is running around. The Brits bring the Firefly VC on the table near the US, it can be seen in the background in the dirt field - they wanted it to knock out the Panther. |
 |
| The StuG III G makes a move against the Firefly VC which is in the open - watch out for the range on those German tank guns! It hits, but does superficial damage. |
 |
| The Panther gets into position to do some damage and opens the road to the waiting SS squad. |
 |
| Here Sherman Sherman ... just a little further ... |
 |
| Unfortunately the fate of the Panther was about to change ... |
 |
| Recce road ... the M8 Greyhound gets backed up by a Sherman 75mm and M5A1 Stuart light tank. The green tide is unleashed towards the hotel ... |
 |
| The 2nd SS squad runs to get into cover - attempting to occupy the area the 1st SS squad vacated to move across the road against the main US infantry thrust. |
 |
| On recce road there are no winners ... only German armoured cars firing paint rounds ... ahhh .. the M8 Greyhound mocks me! |
 |
| The first of 5 smoke rounds land ... they would prove to be very annoying or the Germans. |
 |
| Another smoke lands, preventing the Panther from MG'ing the bazooka team that has moved up. |
 |
| The StuG III G moves to a new position to fire on the advancing Cromwell tanks ... but it would be forced back when the British infantry and PIAT team moved within assault range in the forest. |
 |
| The Panther breaks through the hedgerow to get a shot around the smoke at the Sherman 75mm coming up the road - but a miss! |
 |
| A bad day to be a panther - already having taken a pin from the M8 Greyhound (good roll), the M5A1 Stuart moves up to see if it can put a hole in the side of the Panther ... |
 |
| Wham!! D6 = 6 ... and another ... Kaboom! |
 |
| The poor Panther will not be returning to action anytime soon - this signaled a serious shift in booth the US progress towards the objectives, and ironically in the dice rolling results of the Germans! lol! |
 |
| The SS squads start taking serious MG fire and the balance is swinging fully in favor of the allies. |
 |
| The US infantry and HMG lay steady advance and fire into the SS squads near the hotel. The US infantry does not take a shooting penalty for moving a shooting, which makes them excellent troops on the attack. |
 |
| The Heer MMG re-positions in the house to support the SS squads against the US infantry advance. |
 |
| The US infantry are to the left ... and right of the hotel ... |
 |
| The StuG III G is forced back to the near side of the church and fails to penetrate the visible Cromwell! |
It was at this time that both Roy and I had to attend to our fatherly duties and pickup kids and feed them and the sorts ... with it being a school day tomorrow. For a large game with two new guys playing, and lots of side discussion, we got to the point where we could call it ... the tide was swinging full bore towards an allied victory. The best part, Matt and Tibor loved the rules and are now hooked on Bolt Action!
Onward to more Bolt Action!
Subscribe to:
Posts (Atom)