Materials list:
1 x Armory Matt Black Spray Primer
1 x GW Skull White Spray Primer
1 x Woodland Scenics Clump Foliage Package (any color)
1 x Hot Glue Gun with lots of glue sticks
2mm thickness MDF bases 60mm round (from Warbases - for the large blasts)
25mm round Rendra plastic bases (for the small blasts)
Several stripes of round balsa wood dowels (for creating the armatures for the large blasts)
Several wire spears 50mm long (for creating the armatures for the small blasts)
(optional) 2 x packs of blast craters from Architects of War
The first thing I did was my blast craters from Architects of War. Below is a picture and the steps I used to finish them.
Step1: Black primer.
Step2: Drybrush of GW scorched earth.
Step3: Drybrush of GW graveyard earth.
Step4: Light drybrush of Foundry Sand 10C (can also use GW bleached bone).
Step5: Painted the rocks with Foundry Slate Grey 32A.
Step6: Drybrush the rocks with Foundry Slate Grey 32B.
Step7: Drybrush the rocks with Foundry Slate Grey 32C.
Step8: GW static grass around the blast hole.
 |
| AoW blast craters |
I started with the armatures. I used my drill to drill holes at angles for the "outside" ring of the blast and drilled a straight up hole for the center of the blast. I used my small hand drill for the small blast marker to achieve the same structure for the armatures on the small base. Picture below.
 |
| Base and armatures done |
Next I used the hot glue gun to glue the Woodland Scenics clump foliage to the armatures. You really do need a proper hot glue gun (they are cheap) for this as if you just try to glue it you'll have a slow and/or difficult go of it. I start by getting foliage on the base, then I work the armatures individually, then I fill out the bottom of the blast a little as needed.
Now, using a hot glue gun for this you are going to get lots of "streaks" from the hot glue. Let them dry then use tweezers to remove them. If you try to remove them while they are not dry they'll make a bigger mess. Pictures below.
 |
| Adding the clump foliage |
 |
| Adding the clump foliage |
Next I got my spray paint out. The first thing you want to do at this point is get a healthy base coat of black primer on the clump foliage ... but that doesn't mean spray it from 1cm away! I recommend about 4 "rounds" of black spray. The first I try to hit it from about 8-12 inches away ... getting "under" it (as much as you can while it is not on it's side), in the sides, from the top down, all around. The reason you don't want to be too close is that the power of the spray will blow off the clump foliage. By taking a lighter approach first the paint will help secure the foliage that isn't set firmly by the glue. The second round I tip it on it's side and hit it from the bottom. The third round is really just touch ups ... making sure that I have got black into all the cracks and such. Pictures below.
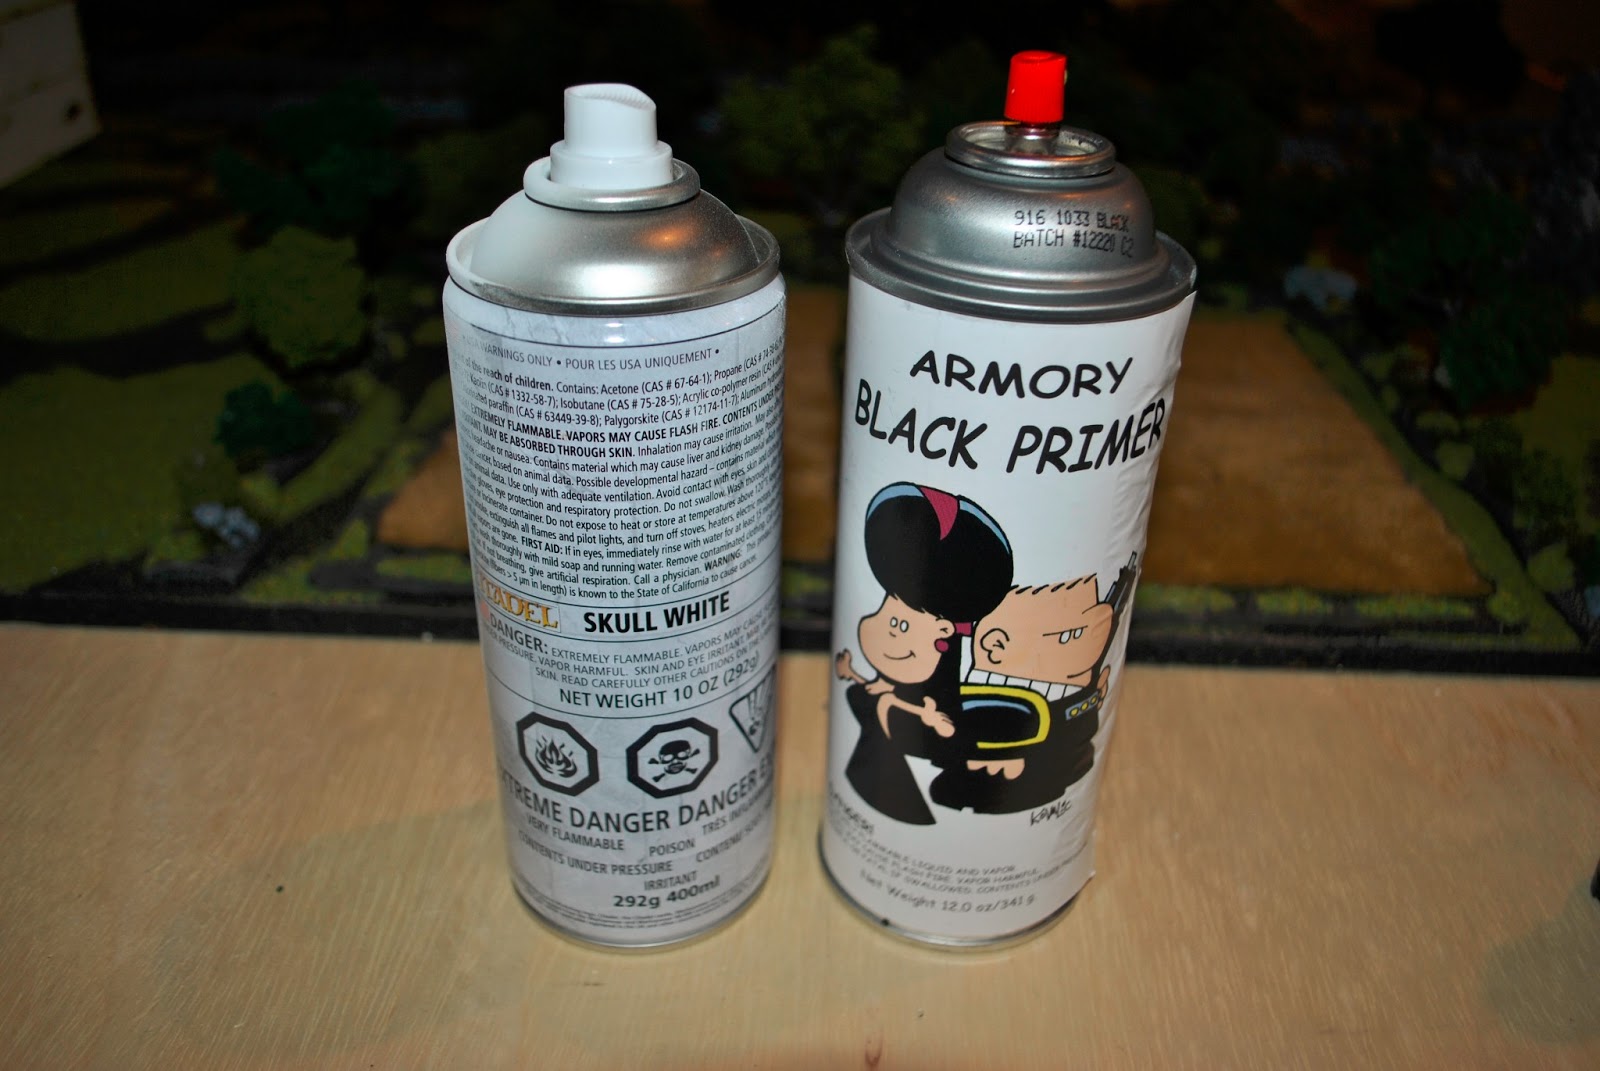 |
| Black and white spray primer |
 |
| Sprayed black |
Ok, almost there! This last step is critical. Time for the white spray primer.
Take your black blast markers ... get the GW white spray paint. It is critical that you do this from about 2-3 feet ... yes, feet, away. I start far away and move a little closer depending on how the white is applying to the clump foliage. If you are too close you'll get black recesses with very white clumps ... it will look not right. You are attempting to get the blast marker into the "mist" of the spray paint. I spray at all the various angles until it looks right. Once you get this done the blast marker is complete. Pictures below.
 |
| Completed blast markers |
 |
| Large blast (for artillery strikes) |
 |
| Large blast size comparison (that is a Warlord Games 28mm Bolt Action miniature) |
 |
| The small blast marker (for mortar strikes) - note it is sitting in one of my blast craters |
 |
| Small blast marker beside a blast crater |
Ok, they'll do ... not the best but good enough for me. You can of course add some "flames" in there if you want using colour washed cotton, or the Flames of War pre-coloured flames (not sure if they still sell it ... I used to have a bunch).
Until next time - happy gaming!
Great idea! Copied!
ReplyDeleteCopy away sir :-)
DeleteHi, Jay...Jay here! This looks to be a very usable and tough piece of scenery.
ReplyDeleteTo be copied in the near future. Thanks.
Hey ... always nice to hear from other Jay's :-) It is sturdy with all that paint on there.
DeleteVery nice tuto and idea!
ReplyDeletePhil.
Thanks Phil!
DeleteA brilliant idea Jay and very well done.
ReplyDeleteThanks for sharing,
Pat.
No problem ... I can only hope my stuff looks 1/2 as good as yours!
DeleteVery cool, my friend.
ReplyDeleteThank you sir ... perhaps the same effect can go for Westerosi wildfire? ;-)
Deletecracking work!
ReplyDeletecheers
Matt
Thank you sir!
DeleteNice job on the markers ,thanks Jay for sharing your ideas
ReplyDeleteJohn