Sunday, November 1, 2015

Omaha Beach Project Update #1

Made some great progress today.  I stopped by Bob's Foam Factory on Saturday and bought all the blue foam I needed to make my Omaha Beach table.  Today I hunkered down and was able to cut and shape all the foam and get the base table completed.  It's been a while since I broke out my Tippi foam cutter --- I really can't recommend one enough if you have to cut foam ... way better than the other types on the market that use the flimsy little wire that breaks constantly.

I wanted the cliff to be imposing.  There will be two large bunkers that hang over the cliff and either side of the bunkers will be trails that lead up the cliff face (so a total of 4 trails leading up the cliff face).  I've included a picture below from Saving Private Ryan that shows roughly what I mean by the large cliff face bunkers.

Picture below taken using my phone camera (some with flash, some without).

Front on view of the base table.

My inspiration for the cliff face bunkers.  Each will have
an approach/trail up either side to reach the top of the cliff.

The cliff is 7.5" above the sand.  I'll be painting
the foam black so it looks more like a finished product.

I really love this particular terrain mat - especially since
it will be very easy to store and transport.


Looking up from the water.


Profile view of the cliff face.


I've started on landing craft assembly - here you can see
one of my LCA's ready to land some armour on the beach.

There will be a sand berm a little before the cliff that will be lined with barbed wire and hedgehogs.  Any infantry section that makes it to the berm can spend an action to detonate a Bangalore torpedo to create a gap in the wire and a crater that will provide light cover.  Bangalore torpedoes will be able to be used twice during the game (creating two gaps in the berm obstacles).

I have a ton of beach obstacles to assemble now ... so moving on to that stage.

Monday, October 26, 2015

28mm Omaha Beach Scenario (Bolt Action)

I've managed to make a lot of good progress on planning my Omaha Beach scenario for DundraCon.  You can see the map of my plan below that covers Dog Green and Dog White sectors for Omaha beach.

The Plan - Scenario Map

One of the catalysts for me doing this scenario was coming upon the outstanding Omaha Beach mat that is available from Terrain Mat.  I already have one mat from them - my sea mat I use for naval games and it is top notch.  The mats come in many different sizes and scales to suit your needs.  I purchased a 5 foot wide by 7 foot long mat.

Terrain Mat - Beach Landing Mat

My terrain mat has arrived (along with a couple of others I ordered).  I've laid it out on my table to flatten out as it is shipped in a large tube.

My mat has arrived!

I'm laying it out to flatten ... you can see the
dark area between the green edge and beach
which is the "cliff face" that will be elevated
by blue foam under the mat.

Of course any beach landing needs obstacles ... and there are many that can and should be used.  Fortunately I was able to source all the various obstacles I wanted.  First up was looking for Cointet Element (C Element or Belgian Gate).  I couldn't find any in 28mm, but there is a provider for 20mm and I've seen pictures of these next to 28mm miniatures - so close enough, these will work.  Gamecraft Miniatures has these - pictures below.

Gamecraft Miniatures Cointet Element (Belgian Gate)

You can connect the gates together ...

Acheson Creations as a 28mm Fortress Europe series of models that are great for beach landings.  I purchases small and large Hemmbalks from them as well as a Tobruk VF67v with APX-R turret.  Pictures below.

Acheson Creations Large Hemmbalk

Acheson Creations Small Hemmbalk

Acheson Creations  Tobruk VF67v with APX-R turret

I'll be using 4Ground's Hedgehogs and Dragons Teeth.

4Ground Hedgehogs

4Ground Dragons Teeth

In addition to the 4Ground obstacles ... I'll be using the hedgehogs and dragons teeth from Warlord Games as well ... pictured below.

Warlord Games Anti-tank Obstacles
(Hedgehogs and Dragons Teeth)

I'm also going to use the bunkers from Warlord Games "Atlantik Wall" set.

Warlord Games Atlantik Wall

To land the troops I have several LCM and LCVP landing crafts from Cor Sec Engineering.  There are of course other kits available now from others but I bought these a while ago when they first released from Cor Sec ... and now I finally get to use them.

Cor Sec Engineering LCM Landing Craft

Cor Sec Engineering LCVP Landing Craft

I'll be building the Pak40 bunkers from foam board in a style similar to the Warlord Games Atlantik Wall set.  Regular US Army and Rangers will recycle onto the table and operate in smaller than normal teams (6 figure teams).  The landing will also be supported by several Sherman tanks.  I need to spend some more time on the exact forces and objectives that will be used.

So, that is it for now ... lots to assemble and get done (although for once no miniatures ... just terrain).

Sunday, October 25, 2015

General Update - 10/25/2015

Hello all!

Well, as I mentioned before, this is my busy time at work and this year has been no exception.  I have one conference down and one more to go, but things are starting to settle a bit.  That being said, I do have some time between now and my next trip to get some pictures taken and perhaps one or two posts up here.

I have two complete brigades for ACW I need to photograph - which I may attempt to get done at some point today.  There is another Union infantry brigade and some cavalry in progress.  I also have another wave of Robotech RPG tactics stuff getting painted.  My modern project also continues - this next week I should have Iraqi vehicles back and I'll have a large group of insurgents and Iraqi Republican Guard back soon as well.  It is times like these that I'm happy to leverage painting services so progress can be made even when I don't have the time.  I've had several packages arrive with ACW terrain I'll be working on between now and the end of the year.

DundraCon approaches this February and I was thinking of running a Normandie beach landing game using my new beach landing mat (Omaha beach) from Terrain Mat (see image below).

Omaha Beach mat from Terrain Mat

I already have all the necessary miniatures to run this game.  I just need to make some bunkers and build the beach obstacles and such (all of which I have).  I also have several landing craft from Corsec Engineering to paint up.

I've also picked up a large green steppes mat and a gunfighter mat from Terrain Mat as well.  I'll use the Gunfighter mat for my Dead Man's Hand games (picture below of the Gunfigher mat).  The green steppes mat can be combined with my beach landing mat.  I need to go buy more blue foam to put under the mat to make the ridges and hills.

Gunfighter mat from Terrain Mat

So, even thought I've been busy with work there has been progress on several fronts.  Last, but not least, my ACW ruleset I think is just about ready.  I have some final edits to do through but it has come a long way from the beginning.  I'm looking for playing more games using that system moving forward (as well as adapting it for Napoleonic's).

Friday, October 2, 2015

28mm American Civil War Terrain

I thought I would put together an article on all the various terrain I'm pulling together for my ACW gaming.  Admittedly some of it is hard to find but most it still available today.

Buildings

I don't have any need to have my troops enter buildings for ACW so I've looked more towards resin buildings than my normal MDF kits I like to use.  Don't get me wrong, there are still a pile of nice looking MDF kits out there, but I really love the look of some of the resin kits you can get.

Sally 4th

First up, the project I'm 1/2 way through, building and painting Seminary College.  This is a beautiful kit that is available from Sally 4th.  I'm really looking forward to finishing up this kit (this is happening very soon!) and will be posting part 2, the conclusion which has been long overdue.  Picture below from the Sally 4th website of the completed kit.  This is the only MDF building I'm planning to use at the moment.

28mm Seminary College
Sally 4th

Hovels

I've used Hovels in the past and they make some great resin buildings in many scales and periods.  They have a great ACW range, but I was looking specifically for their following kits:

  • 23AC - Clapboard house from Guiney Station. South of Fredricksburg where Stonewall Jackson died 1863.
  • 24AC - 'Four Chimneys' Three storey brick house, four chimneys shuttered windows, veranda with tiled canopy. This house also from Guiney Station.
  • 40AC - Leister House ( Meades Headquarters).
  • Discontinued - Brawners Barn
  • Discontinued - Brawners Farmhouse
  • Discontinued - Bryan House
Although the last three are discontinued you can still find it from secondary dealers.

Hovels 23AC

Hovels 24AC

Hovels 40AC

A better paint job on 24AC and Brawners Barn on the right.

Perry Miniatures & Renedra

I also plan to do the Perry Miniatures North American Farmhouse model and the ramshackle barn and church from Renedra.

Perry Miniatures
North American Farmhouse

Renedra
Ramshackle Barn

Renedra
North American Chruch

Obstacles (Fences & Walls)

If you are going to play ACW you are going to need a heck of a lot of fences and stone walls.  I have stone wall sets from Architects of War that I've used for years now.  Additionally, I've picked up some of the hasty works set from Architects of War as well.  These blend in nicely with the stone walls I already have from them and can also work with the Architects of War overgrown stone wall set and hedgerow sets.  I've also picked up stone fencing from Monday Knight Productions (PW01 and RW01) that although a little on the smaller side, works well for marking the area around a farm house or similar.

Architects of War
Hasty Works

Monday Knight Productions
PW01

Monday Knight Productions
RW01

A mix of Monday Knight Products RW01 and PW01 with
Hasty Works from Architects of War.

Although very hard to find these days, the Lemax Snake & Rail fences look horrible out of the box but are actually very good.  I lucked out and recently got some off of Ebay for cheap.

Lemax
Snake & Rail Fencing - "out of the box"

Lemax
Snake & Rail Fencing - with a little TLC

I've also got a bunch of the Cross & Rail fencing with stone bases from Renedra.  Their picket fencing is also top notch and I'll be using that as well along with their 5 bar fencing.

Renedra
5 Bar Fencing

Renedra
Picket Fencing

Corn Fields

Last but not least are corn fields.  Matt Hilzendrager has the best looking corn fields I've seen - but they have been painstakingly put together using wire and rubber bands.  You can of course attempt this on your own, but I found an equivalent solution using O-scale corn stalks from JTT (easily found on Ebay).  What is great about the JTT corn stalks is that you can get both healthy corn stalks and dried up corn stalks.  I've order both.

JTT of Ebay
2" O-Scale Corn Stalks

JTT off Ebay
2" O-Scale Dried Corn Stalks

You can't beat the price on these and they are very nice.

Well, that certainly gives me a lot of terrain to go work on and will fill out my ACW battlefields very nicely.  Hopefully you've all found this useful in some way.

Monday, September 28, 2015

ACW AAR - Peterson's Farm

I hosted a decent sized ACW game to play test the rules I've been working on called "This Hallowed Ground" this past Sunday.  Matt Hilzendrager brought along some of his troops and terrain to supplement my now growing collection of ACW stuff.  Roy Scaife, Dan Kerrick and I took on the Union forces while John Lantz and Matt took the Confederates.

Milling about before the game.

I wanted to accomplish several things with this first play test:

  • Get a goodly portion of terrain on the table, specifically light woods and lots of fences (wood and stone).
  • Farm buildings with yards that would have to be navigated.
  • Corn fields that provide obscurity (but not cover) to units that are within the field.
  • Fight a meeting engagement against equally match sides.

The game took about 4 hours, and that is with all new players and me taking notes and explaining rules thoughts along the way.  I was both happy with the game play experience and the length of the game - as where the others.

I've included a brief overview of the rules after all the fancy pictures below.


Union Order Of Battle


  • Army Commander
    • 1st Brigade (Iron Brigade)
      • 1 x Brigade Commander
      • 5 x Infantry Units
      • 1 x Artillery Unit
    • 2nd Brigade (Irish Brigade)
      • 1 x Brigade Commander
      • 3 x Infantry Units
      • 1 x Artillery Unit
    • 3rd Brigade
      • 1 x Brigade Commander
      • 4 x Infantry Units
      • 1 x Artillery Unit
    • 4th Brigade
      • 1 x Brigade Commander
      • 2 x Cavalry Units

Confederate Order Of Battle

  • Army Commander
    • 1st Brigade
      • 1 x Brigade Commander
      • 4 x Infantry Units
      • 1 x Artillery Unit
    • 2nd Brigade (Texas Brigade)
      • 1 x Brigade Commander
      • 4 x Infantry Units
      • 1 x Artillery Unit
    • 3rd Brigade
      • 1 x Brigade Commander
      • 4 x Infantry Units
      • 1 x Artillery Unit
    • 4th Brigade
      • 1 x Brigade Commander
      • 2 x Cavalry Units


The Game

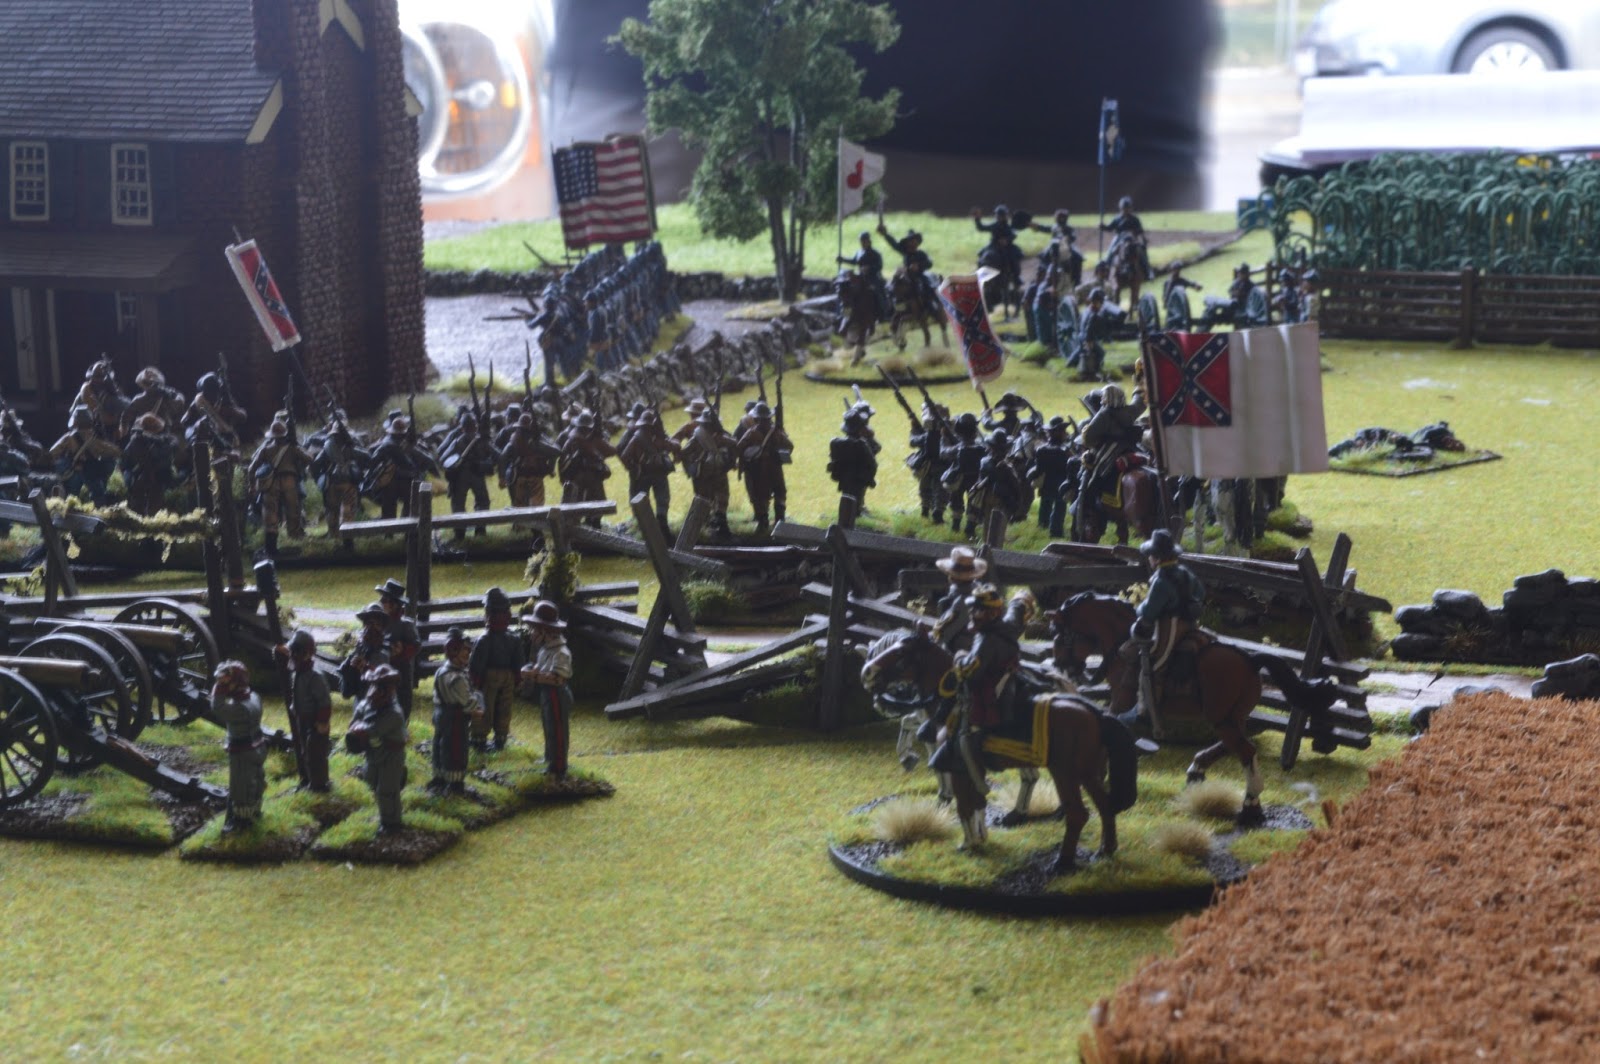
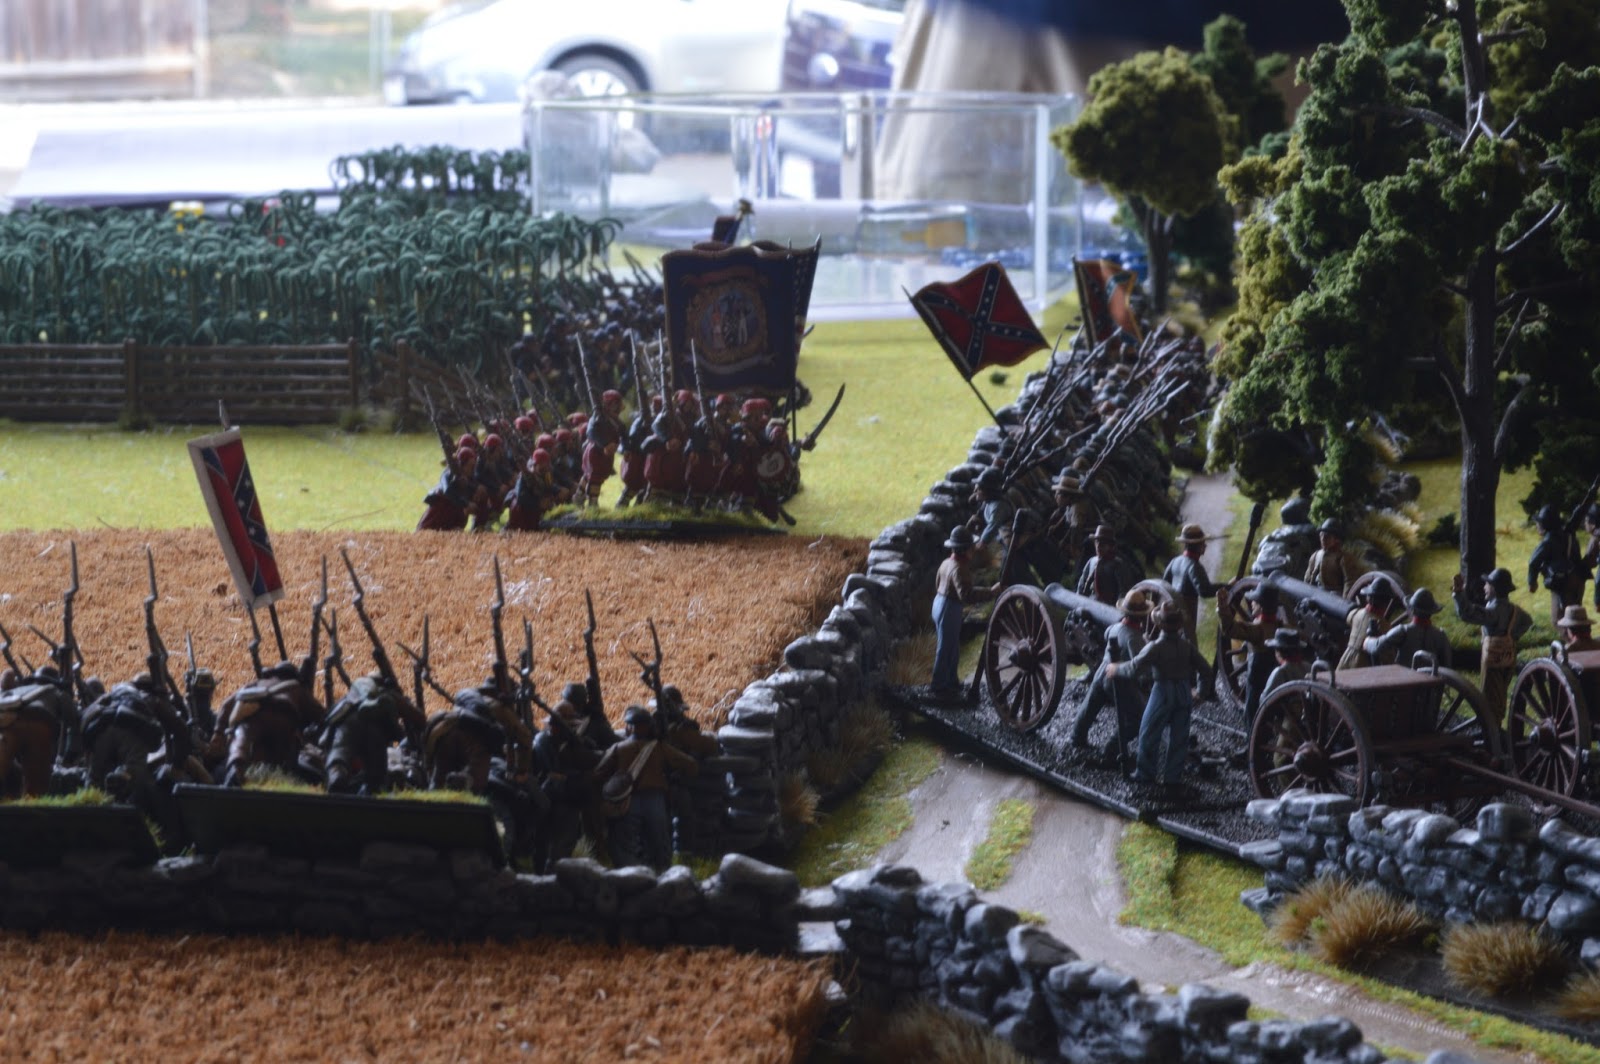
What a game!  The Rebel cavalry held out the entire game against the Union cavalry that was supported by the Iron Brigade.  The Iron Brigade managed to turn the flank of the Rebel line but it was too late as the Texas Brigade had already done the same on the opposite side (after some rather nasty melee in the light woods).  My Irish Brigade held the central farm until a multiple unit charge from a couple of fresh Rebel units broken through and punch a wide hole straight through the center of the Union line before the units over extended themselves (via breakthrough charges) and eventually got shot up by Iron Brigade units and what little remained of the Irish Brigade.

A very bloody battle, but in the end the day went to the Rebs!  Lots of pictures below (some taken on my phone, some with my camera).

Starting positions.

The Union left flank would see heavy fighting in the
light woods against the Texas Brigade.

The Texas Brigade would carry the day for the Rebs.

The Iron Brigade  marches into position.

Dismounted rebel cavalry would prove a constant thorn
in the Union right flank.

Virginians advancing - they would break through the
Union center to cause all sorts of problems.


First melee of the game.  The melee was a draw but
not for long as the Union infantry was flanked by
swarming Texas units!


The Iron Brigade struggles in a bottleneck around the
white farm building.  They would take to long
to turn the Rebel flank.

Ka-Pow!  The lead Irish Brigade units are overrun and
the Virginians break through the Union center!

Union staff are surprised and quickly order all available
units to put fire into the advancing Virginians.


The Union center and now left flank is hit hard by the
Rebel Yell - this final melee would carry the day for the Rebs!

The 5th NYSV facing a wall of Confederate grey.


A bloody mess, after forcing the Virginians back there
are only dead bodies and destroyed Union guys to show
for the Union center. 


There is going to be some hauntings in these woods!

There you have it.  A great game overall and very bloody on both sides.  Now a little about the rules (I'll do a more detailed post after making the edits I need to do based on this game).

The Rules (Briefly)

It is probably best to provide a quick run through of the turn sequence, with each of the phases broken out into their individual steps as well.  The overall turn sequence is as follows:
  • Initiative Player
    • Command Phase
    • Shooting Phase
    • Melee Phase
  • Non-Initiative Player
    • Command Phase
    • Shooting Phase
    • Melee Phase
  • End Phase

The command phase is used to move and manage your units on the table.  Before resolving individual brigade activation, players must resolve all charges first (that is, the charge to contact, not fighting the actual melee which happens in the melee phase).
  1. Attach or detach commanders
  2. Resolve Charges
  3. Activate Brigades
    • Select a brigade to activate
    • Resolve orders for all units in the brigade (that have not charged)
    • Move brigade commander (if not attached)
    • Repeat steps a thru c until all brigades have been activated
  4. Move army commander (if not attached)

There are six orders that can be issued to a unit:  hold, advance, march, charge, rally and reform.  Orders are automatic unless the unit has hits on it.  Any unit with hits has to take an orders test.  Orders test are successful by getting a result higher than the current number of hits on the unit.  This means that units that are more damaged are less likely to follow orders (due to battlefield confusion, loss of unit leadership, and so on).

All charges are resolved at once so that any multiple unit charges can be resolved as a group.  Once resolving all charges, the remaining units in the army activate by brigade to resolve orders (then shooting, then melee).  Provided a unit can successfully charge, they will take a charge home test to see if they actually make it into contact with the target (many charges where checked or faltered for any number of reasons, turning into a firefight at close range rather than a hand-to-hand affair).  As a result, a charge home test could result in anything from being yellow bellied (not moving at all), moving forward to deliver fire, charging in or even a determined charge (meaning, no morale test required from defensive fire).

No surprises in the shooting phase - it is fairly straight forward.  I've gone to great lengths to simplify the effect of terrain on shooting and be clear about line of sight.

Likewise, melee is also straight forward and deadly as there are no saves in melee.  I wanted melee to be deadly and costly for units as a melee was a deadly and messy affair.

For morale I've opted to go with the Kings of War system of units collecting hits and taking a morale test that is 2D6, add hits and check against two numbers.  Each unit in the game has a "shaken" and "break" number.  For example, an infantry unit is 14/16.  If you roll a morale test and get a result of 13 or less, the unit remains steady.  If the result is 14 or 15 the unit becomes shaken and will be severely limited in what it can do in the game (the unit is on the edge of breaking).  If you get 16 or more the unit breaks a is removed from the game.  I've really come to like this system for morale - it gets you rolling more dice for shooting and melee, and gives units a little more staying power than other systems I've played.

Ok, that is just a quick overview.  Hopefully that all makes sense.  Certainly more to come on this front.