Tuesday, December 31, 2013

Demo Day - Muskets & Tomahawks

Hello all,

I recently ran a demo day for Muskets & Tomahawks at the local game store by my place - Game Kastle (Fremont).  Roy Scaife and I ran a couple of games in parallel with some new players who had never played the rules before.  Good news, they bought miniatures and the rules right after the games wrapped up :-)

Setup and ready to start
(after a quick Subway sandwich!)

I did up two scenarios that ran 300 point lists on each side.

Muskets & Tomahawks
Scenario – The Meeting

Background

British – A French trading post has become a common location for meetings between French officials and Indian tribal leaders.  Your orders are to destroy the trading post and kill any French units in the area. If you come upon any Indian or French leaders they should be captured and returned for questioning.

French – We are meeting with the council of elders that represent the Indian tribes in this area. Make sure the officials remain safe and if attacked your orders are to escort the Indian elder council away from the battle area.  If the elder council is killed or captured that would negatively impact our relationship with our Indian allies in the area.

Forces

British (300pts)
(1) British Regular Officer
(8) British Regulars
(8) British Grenadiers (Sharpshooters)
(6) Rangers
(6) Light Infantry

French (300pts)
(1) Canadian Militia Officer (Coureur des bois)
(8) Canadian Militia (Coureur des bois)
(1) Indian Chief
(6) Indians
(6) Indians
(6) Civilians (Indian tribal elders)

Objectives

British
Capture the Indian elder council = 3 VPs
Kill the Indian elder council = 1 VP
Each French (non-officer) unit killed = 1 VP
Capture the French officer = 2 VPs
French officer killed = 1 VPs

French
Escort the Indian elder council safely off the table = 4 VPs
Each British (non-officer) unit killed = 1 VP
Capture the British officer = 3 VPs

British officer killed = 2 VPs


Muskets & Tomahawks
Scenario – Local Diplomat

Background

British – A local civilian leader has been highly effective in negotiations with local Indian tribes. We've learned that the French seek to eliminate this diplomat and my be on their way right now to do so. Your orders are to secure the local leader and escort him to Albany. If attacked, save as many of the local settlers as possible as if we leave them to the mercy of the French the local leader will be very upset and may not continue to aid our efforts.

French – A local civilian leader has been causing trouble with the areas Indian tribes.  We must capture this leader so we can turn him to our cause, or if that isn't possible than we should kill him. It would also be helpful to capture as many of the local settlers as possible as we can use them to help persuade him. However, if the locals are not cooperative, kill as many as possible to send a message to those who would work against us.

Forces

British (300pts)
(1) British Regular Officer
(12) British Regulars
(8) British Grenadiers
(8) Rangers
(1) Local Leader
(6) Civilians
(6) Civilians

French (300pts)
(1) French Regular Officer
(8) French Regulars
(8) French Regulars
(8) Compagnie Franches de la Marine
(6) Indians
(6) Indians

Objectives

British
Evacuate the leader through the designated area = 3 VPs
Each civilian group evacuated through the designated area = 2 VPs
Each French (non-officer) unit killed = 1 VP
French Officer killed = 2 VPs

French
Capture the local leader = 3 VPs
Kill the local leader = 2 VPs
Each captured civilian group = 2 VPs
Each killed civilian group = 1 VP
Each British (non-officer) unit killed = 1 VP
British Officer killed = 2 VPs


Not your normal layout for M&T scenarios ... but we figured we've give it a try.

Wednesday, December 25, 2013

GameTime Quicky #1

Hello everyone! Just posted up a "quicky" update for GameTime. For all the people who are following my blog, thanks for joining me this past year. I hope you are all enjoying the holidays and have a great 2014! I certainly have lots of plans for this coming year around gaming. I just ran some Muskets & Tomahawks demos at a local game store (posting pictures/report in a separate post later today).

 You can view the Game:Time quicky update by clicking here or via the embedded video below.

Note: All of the Game:Time videos are filmed and uploaded in HD. YouTube does not generally default to HD unless you have it set to do so in your YouTube settings for playback. If you click the little cog in the lower right of the YouTube screen you can select 1080p (if you have a good internet connection) for a higher resolution.


I've been building 4Ground buildings and getting my Bolt Action stuff up and running. I've also very interested in playing through a couple of games of Chain of Command to compare and contrast the two "popular" WW2 platoon level rules. I'm also interested in the hybrid of the two (stealing the patrol phase from CoC for BA ...).

Looking back I've had a great year.  Although work has taken up a bunch of time in the 2-3 months, I've managed to get in a few games.  I ran a Wednesday night Descent campaign (16 games!) that concluded successfully just before Thanksgiving.  We'll likely start up again in the new year as we've had a lot of fun with that game.  I've been playing small games of Muskets & Tomahawks and some other games, but haven't been able to get blog posts done about them.

The next episode of Game:Time is very near completion and we'll be filming an episode on the Game of Thrones boardgame that will be fun as well.  Looking to do Muskets & Tomahawks for the next miniatures game episode ... so stay tuned!

Tuesday, December 10, 2013

GameTime - Episode 1: Dead Man's Hand

Hello all,

I know I promised a post or two in the last couple of weeks, but I have some news to share.  I'll of course still be posting on this blog as I complete projects and play games, but my group and I have also decided to do some web videos about miniature and board gaming.  I'll be posting the episode links as they become available on this blog.  We are planning to do a few episodes for now and we'll see if anyone actually wants to watch.  If so we'll continue producing new videos.  I'm by no means an expert video producer but I think what we've created is definitely watchable.

So here you go, episode 1!

GameTime
Episode 1: Dead Man's Hand

In this episode we talk about the Viking Horde Papercraft Kickstarter, take a look inside the massive Ogre boardgame box, and play a couple of games of Dead Man's Hand.  Please find the links below to the videos that are posted to YouTube:

Episode 1, Part 1 (of 4): Introduction (10 minutes) - in this part we talk about the Viking Horde Papercraft Kickstarter and take a look at the Ogre boardgame box.


Episode 1, Part 2 (of 4): Dead Man's Hand Overview (15 minutes) - in this part I take you through a look at the terrain, counters, and miniatures I use in my Dead Man's Hand collection and also we walk through a typical game turn as an example of how to play Dead Man's Hand.


Episode 1, Part 3 (of 4): Scene 1, The Stranger (7 minutes) - In this part we play out the first scene of The Good, The Lead And The Ugly which is called "The Stranger."


Episode 1, Part 4 (of 4): Scene 2, This Town Ain't Big Enough (19 minutes) - In this part we play out the second scene of The Good, The Lead And The Ugly which is called "This Town Ain't Big Enough."


The plan for episode 2 is the play a game of Ogre (alternating between miniature and board games).  We'll are looking to do SAGA, Muskets & Tomahawks and Bolt Action on the miniatures front and Game of Thrones, Zombicide, and Kingsburg on the boardgame front (plans subject to change of course).

Anyways, I hope you enjoy the episode so we can keep making more :-)

Some pictures from the game and setup are below.


If you do take the time to watch, please let me know if you think this is a worthy endeavor or if I'm just wasting my time.  Cheers and merry Christmas (or whichever holiday you observe, if any) everyone!

Sunday, October 20, 2013

Still alive ... progress coming soon ...

Hello all,

Just a quick update today for those who think I may have taken a long walk off a short pier.  The mid-September through November time frame for me gets a bit crazy at work so between that and the kids I've found myself neglecting my hobbies.  That being said, I've been assembling 4Ground buildings and have made some steady progress.  I hope to post up the completed buildings so far (started with the largest ones of course).

I also received my Pegasus Bridge boxed set from Warlord Games ... a box full of goodies that immediately triggered plans for a custom table on my part.  I have to do something with all that blue foam I have sitting around!

I also have the rest of my Napoleonic Prussian army all done.  All I have to do is finish basing several units then I'll post up pictures of that army.  I think I also owe pictures of my large French and Austrian armies for Napoleonic's as well ... unfortunately my camera took a bit of a spill and has not been working the same as it used to since (another reason for fewer posts) ... so I think I'll have to be purchasing a new camera soon.

I plan to post up step-by-step progress and pictures of my Pegasus Bridge table build.  I have a WW2 reenactment coming up, but straight after that (if not one night this week) I'll be starting into that build while picking away at my pile of 4Ground buildings in between.

I also have to say thank you to all of you who read the blog.  I passed 100 followers recently and I feel like that is a significant "blog milestone" - so really, thank you.  If you all didn't read this blog then I would have no reason to post anything.

So stay tuned, I'll buy a new camera and get back to posting very soon!

Best regards,

Jay

Saturday, September 21, 2013

Bolt Action British & German Vehicles

My Bolt Action collection grows significantly with the introduction of a lot of armour for both my British and German armies.  I of course have more vehicles to get done, but what is below gives me a decent selection of different vehicles to field for both sides.  Special thanks to Seth for a great job on these.  Seth is a local painter who is very talented with air brushes.  I'm now spending my full attention on my Bolt Action project --- I was able to finish up the building of the police station and warehouse from 4Ground and will post pictures of those once I finish up the basing and after assembly details.  Of course, a ton more 4Ground buildings to build, but I'm looking forward to it!

The German vehicles done so far.


I have six British armoured vehicles to start and plan to add more.

The group of British vehicles.


Tuesday, September 3, 2013

CelestiCon 2013 Convention Report

Hello all!  Well, a spectacular weekend was had at CelestiCon.  I have to say I definitely "got my game on" this weekend.  Our merry crew of con gamers consisted of Roy Scaife, John Lantz, Dan Kerrick, Wade Shows, and a good friend of Wade's who flew in from Seattle - Les (and of course, myself).  We played several board games, one of which that turned out to be a lot of fun (and new for me) was Eclipse - a space exploration and resource management game.  I liked it far better than Twilight Imperium (for those familiar with that game).

But enough of that, let's get on with the miniatures games.  There is a heck of a lot of pictures of the various games below which include my demo games of Dead Man's Hand (Old West), WW2 Bolt Action, Muskets and Tomahawks (French & Indian War), ACW, This Quar's War, and Rhodesian bush war!

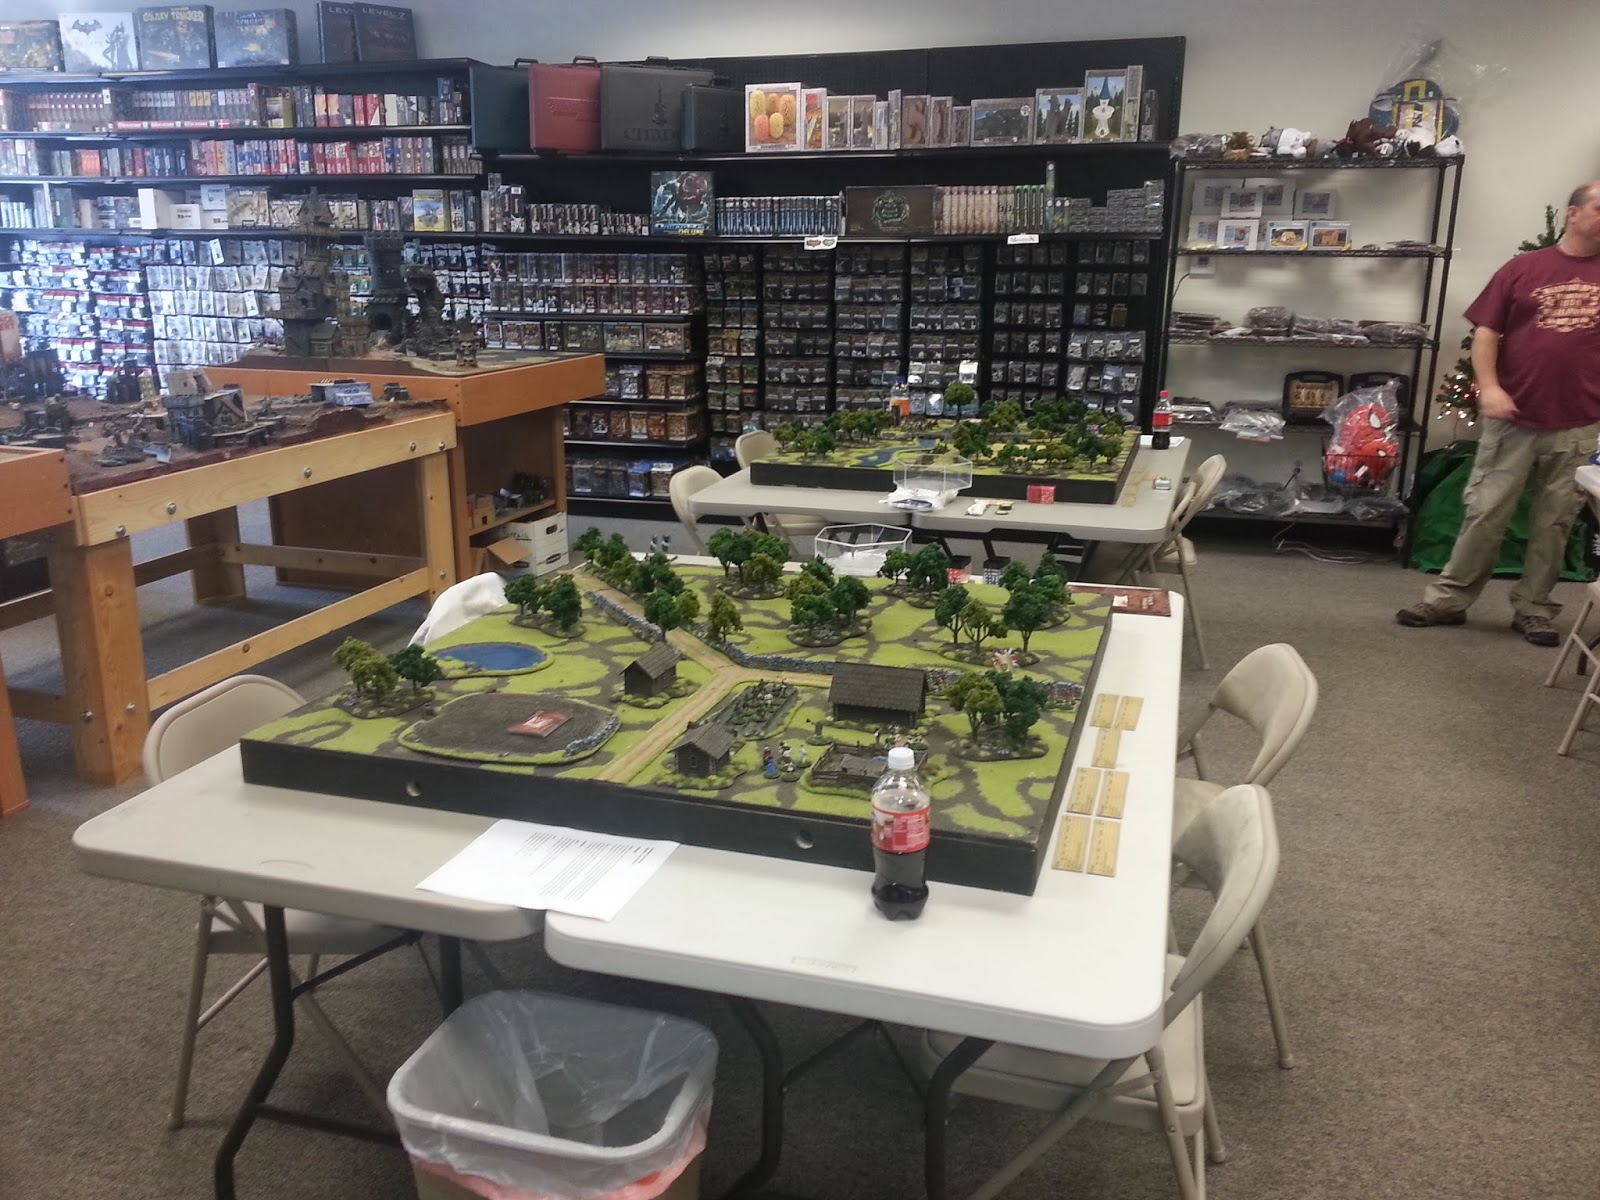
First up, Friday afternoon and evening was time for me to play and demo Dead Man's Hand.  We setup my little table in the miniatures room and started rolling through some games.  It was a lot of fun and played quickly allowing several pairs to play through some games.  The table generated lots of interest from arriving con goers.  Since I only have two gangs painted we used only the Lawmen and Desperados for the scenes that we played - however, we did get to play through ever scene in the book, some of them twice!  Some spectacular rolling and events unfolded with rousing shouts from those involved - including a wham bam 20 "your Sheriff is dead" moment (gunned down by an Indian).  All who played through enjoyed the fast paced "old west movie" style of the rules.


Next up is the Muskets & Tomahawks game I ran - the Siege of Fort William Henry.  I filled up the fort with several "out of play" miniatures to give the appearance of a busy section of ramparts with several models running about.  The fort was armed with six guns - four that were dedicated to the artillery duel with the French siege batteries, and two in support of infantry actions.

The scenario was to have the British send messengers to Fort Edward to call for help and report on the numbers and disposition of the French forces (which would have been helpful since in the actual siege, general Webb was fooled into believing the French force was larger than it was, pushing him to delay moving to the rescue of the fort in favor of waiting for additional forces to arrive at fort Edward - and of course he didn't want to remove the last remaining British force between the French and Albany) while the French are attempting to win the siege before the messenger gets away.

The French and British both had four guns (artillery) facing off on one side of the fort.  For the infantry action, the British had the following:

  • Rangers (8) - deployed outside the fort, screening the right of the fort.
  • Rangers (8) - deployed outside the fort, screening the left of the fort.
  • 3 messengers - acting on the irregular card, moving as three separate units.
    • Messenger special rule:  Messengers can only be shot if they are the closest target.
  • Highlander Grenadiers (12)
  • Highlander Infantry (12)
  • Regular Infantry (12)
  • Regular Infantry (12)
  • Regular Infantry (12)
  • Regular Officer (2)
All British regular infantry started deployed just outside the main entrance to the fort, or on the road coming out of the doors to the fort.

The French had:
  • Compagnie Franches de la Marine (12)
  • Canadian Militia (8)
  • Canadian Militia (8)
  • Canadian Militia Officer (1)
  • Indians (6)
  • Indians (6)
  • Indians (6)
  • Indian Leader (1)
  • French Regulars (12)
  • French Regulars (12)
  • French Regulars (12)
  • French Regulars (12)
The French forces are spread fairly evenly across the table edge opposite of the fort.

The British objective is to exit a least one messenger off the tables edge where the road leaves the table - somewhere between the zone that is 8" in from either side of the tables long edges (so with the center 32" of the table edge that road exits).  The French, have to stop the British messengers (by killing them all) OR win the siege by destroying the four British fort guns opposite the French siege position (a built up position that contains four French siege guns).  Both the French and British artillery involved in the "artillery duel" cannot be targeted or assaulted by any of the others forces (as they are considered to be well defended).  

The idea is that there is a gap in the French lines, and for the British it is a bit of a race to get the messengers off before the French can move forces into the way to block the British from getting through their lines and out through the table edge with the road.  

The French and British siege guns need to hit on a 6+, can fire once per turn (use a single artillery card in the deck, and automatically reload at the end of the turn), and knock out a gun on a roll of 4+ if a hit is scored.  British guns that are knocked out remain out of action while French guns that are knocked out are only out of action for a single turn.  This represents the growing fire superiority of the French artillery as the siege lingered on (as the British barrels started cracking and eventually was a significant factor in the British surrender as the fort's ability to slow the French engineers progress toward the fort was all but eliminated).

This was a close run game.  The British got distracted in a volley duel with the French regulars which allowed the French to get units into position to block the British messengers (two of whom died before running back to the fort).  A single British gun was knocked out (the game lasted four turns).  Some bad rolling on both sides for the siege artillery duel.

Overall, some minor tweaks to be made, but a fun scenario that was played over the four turns that are about average for my larger M&T games.


The ramparts.

French siege position.

The fort fires and takes fire.

The side of the artillery duel.

French units move into position to
cut off the British messengers.

French artillery position.

The scene of the infantry action.

A tough day for regulars on both sides - man casualties.
The Indian unit in the foreground got hit by a enfilade
artillery shot from the fort and completely destroyed.

John Lantz from our group played in a Rhodesian bush war game put on by John Comiskey.  The game used a modified version of Bolt Action to simulate the irregular warfare of the conflict.  Excellently painted miniatures with some nice custom terrain items to set the theme.  This was going on at the same time as my Fort William Henry game so I didn't get to play in it - but as explained by John it was several RLI (Rhodesian Light Infantry) sticks moving in to raid a ZIPRA training camp.


John Lantz has been working away on a custom Bolt Action table in the past few months that consists of two 2'x4' boards that can be combined to form a 4'x4' table.  John is the first of our group to try the "Teddybear Fur" approach to table making.  In my opinion his efforts paid off and the table looked spectacular!  I look forward to future games on his table.  He had several details laid down that just completely make the table - including telephone poles, train tracks (S-scale and weathered), different tree types, a road, rocks/boulders, small patches of flowers and bushes ... just a really nice job all around.

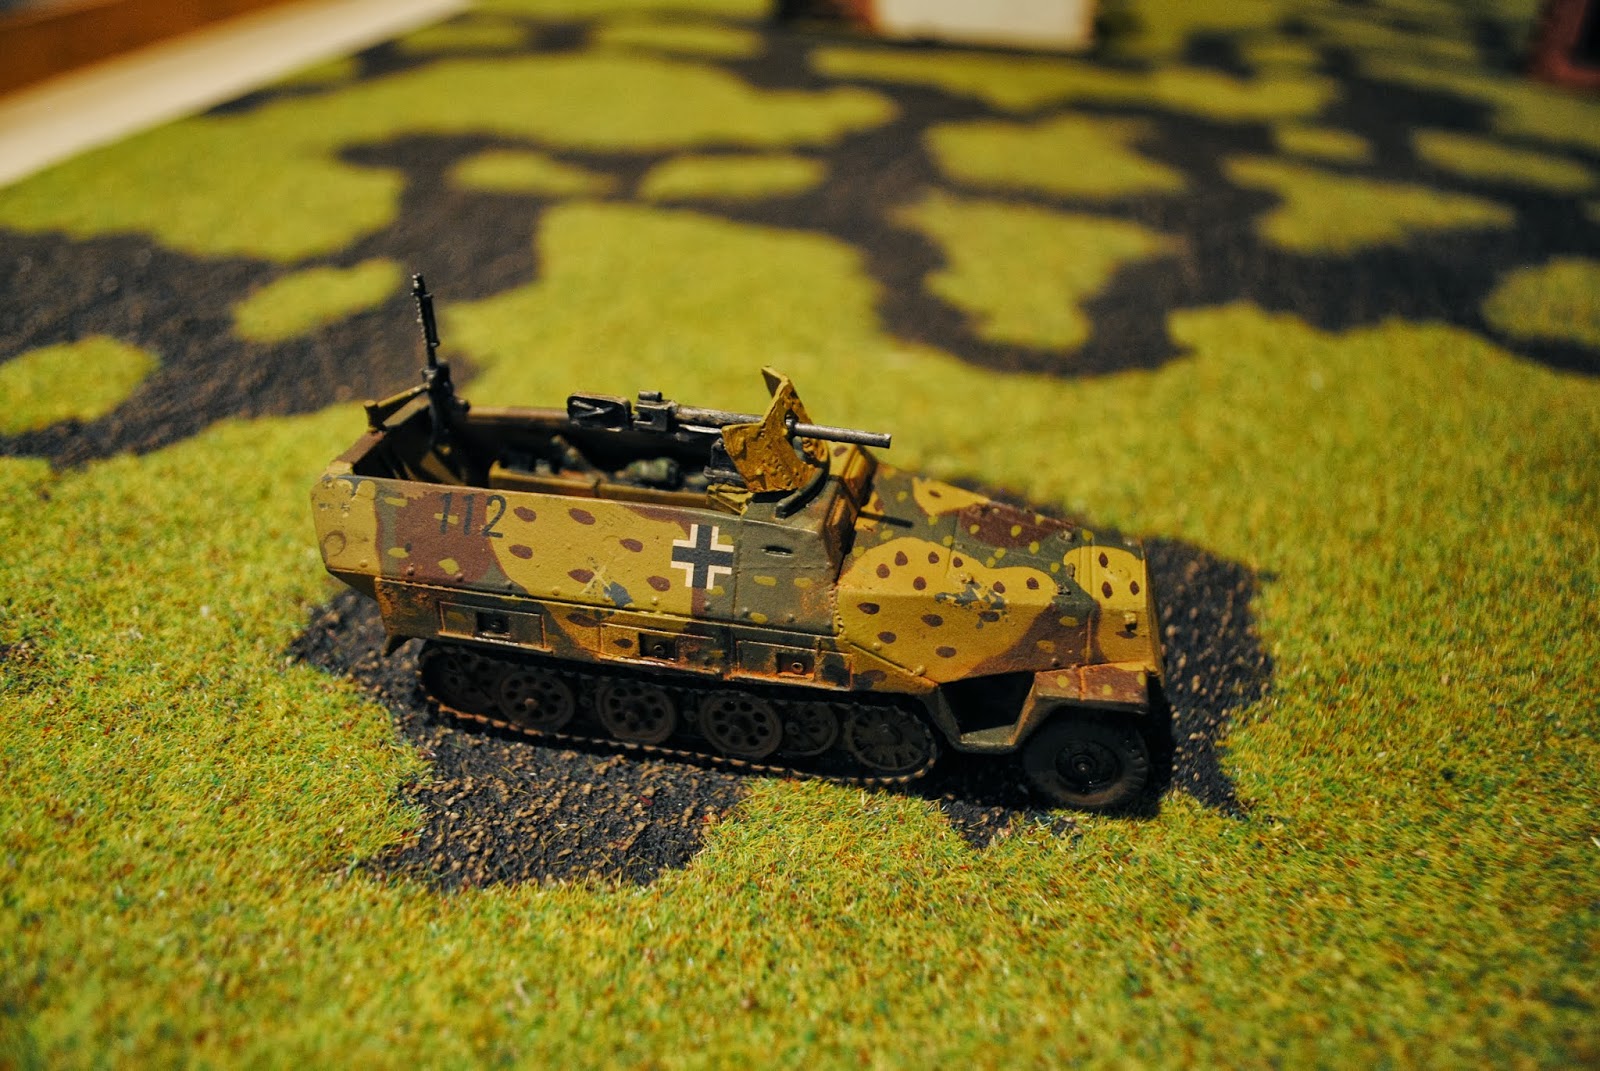
This game had a 500pt force of German army force (2.5 sections of infantry, MMG team, medium mortar team, medic, and officer) take on a 500pt force of Russians (don't recall the organization off the top of my head, mostly just infantry with an MMG team as I recall).  The Germans had to advance up to the buildings and light the buildings on fire.  The Germans never made it and got shot up fairly bad in the advance (mostly, IMO, because the Germans failed to use the mortar to lay down smoke to cover the advance).


A rare picture that I'm actually in - on the far right!
(from left to right - Wade Shows, Dan Kerrick, Jay White)


A large ACW game using home brew rules focused on the Union breakout at Petersburg.  This was put on by the famous Rick Schuldt who is relentless in his efforts to run visually stunning and large wargames.  My hat goes off to Rick because he runs these large games each day of the convention which takes an enormous amount of effort!  This game was no exception, with stunning terrain and loads of models.  I didn't get a chance to play in it but couldn't help but share some pictures of the action.


Another of Rick's games underway - North Africa WW2 which he ran on Friday night.


The fine folks at ZombieSmith had a booth in the dealer's room and I managed to get a game in with them testing out the This Quar's War v2.0 rules (or at least, and extremely early look at what a v2.0 could look like - using a new and unique activation system that I really like).  Some of my group decided to join us for the play test and had a great time running through the system.


A busy but great weekend I must say.  I've really come to love this convention as it is on the smaller side, but the people in attendance are all very nice and very easy to work with (for example, when getting tables for spontaneous miniature games).  I very much look forward to next year and another weekend full of gaming.  Next up for me is KublaCon in May and likely (and finally) a trip out to HistoriCon in 2014.

Until next time, happy gaming!